1.
File - open new transparent image 700x550
Set in the material palette the foreground color on white and the background
color on
#8d2316
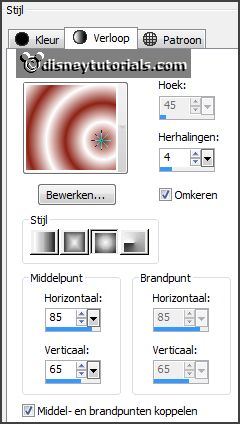
Make from the foreground a gradient sunburst - with this setting.
2.
Activate flood fill tool - fill the layer with the gradient.
Layers - duplicate.
Image - mirror.
Set the opacity of this layer to 50.
Layers - merge - merge down.
3.
Layers - new raster layer.
Fill the layer with the background color.
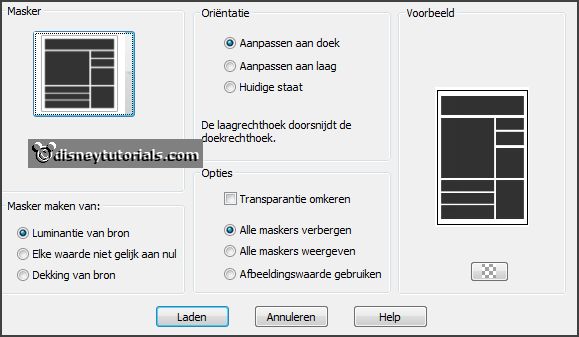
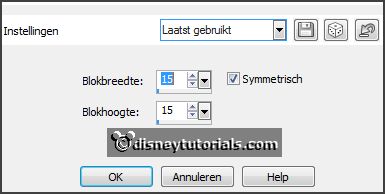
Layers - load/save mask - load mask from disk - look 79 maskkels WWA - with this
setting.
Layers - merge - merge group.
Effects - 3D Effects - drop shadow - with this setting.
4.
Activate the magic wand - with setting below - select as below.
Selections - modify - expand 10 pixels.
Activate raster 1.
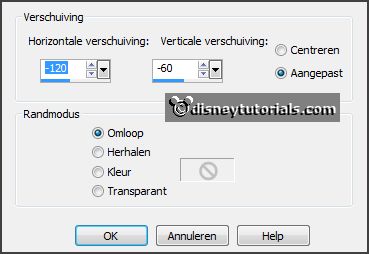
Effects - Distortion effects - Pixelate - with this setting.
Effects - Edge effects - enhance.
Selections - select none.
5.
Activate the tube micmin1 -
edit - copy.
Edit - paste as a new layer on the image.
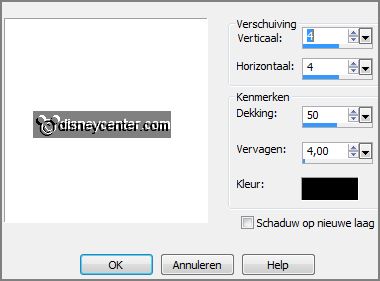
Effects - Image effects - offset - with this setting.
Effects - 3D Effects - drop shadow - setting is right.
6.
Activate the top layer.
Activate the tube young_love_loveheartcenter_wordart_candy -
edit - copy.
Edit - paste as a new layer on the image.
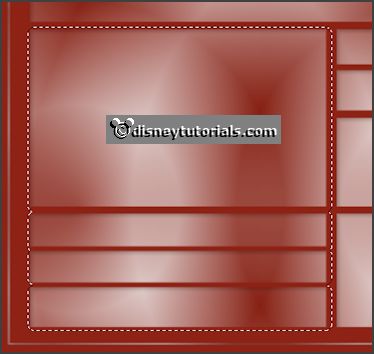
Activate move tool - place it right at the bottom - see example.
7.
Activate the tube hart -
edit - copy.
Edit - paste as a new layer on the image.
Place it in the second square of the bottom - see example.
Effects - 3D Effects - drop shadow - setting is right.
8.
Activate the tube always -
edit - copy.
Edit - paste as a new layer on the image.
Place it in the top square - see example.
9.
Activate the tube love -
edit - copy.
Edit - paste as a new layer on the image.
Place it in the square below - see example.
10.
Activate the tube witte rand -
edit - copy.
Edit - paste as a new layer on the image.
Place it in the top square at the top - see example.
11.
Select with the magic wand the white rectangles.

Layers - duplicate.
Lock the top layer and activate raster 7.
Fill the layer - as below.

12.
Lock this layer and open copy of raster 7.
Fill the layer - as below.

Selections - select none.
Give both layers drop shadow - setting is right.
Open raster 7 and lock copy of raster 7.
Layers - new raster layer - put your watermark into the image.
13.
Edit - copy merged.
Open Animatie Shop - paste as a new animation.
14.
Back in PSP.
Lock raster 7 and open copy of raster 7.
Edit - copy merged.
In AS - paste after active frame.
Edit - select all.
15.
Animation - Frame properties - set this to 25.
File - save as - give name - click 3 times at next and than at finish.


