1.
File - open new transparent image 800x600.
Set in the material palette the foreground
color at #5f5e23 and the background color
at
#5d3300.
Activate flood fill tool - fill the layer with the background color.
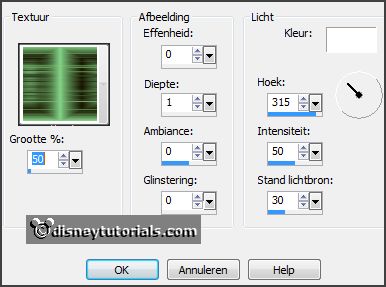
Effects - Texture effects - Texture - 1&k2 - with this setting.
2.
Layers - new raster layers.
Fill the layer with the foreground color.
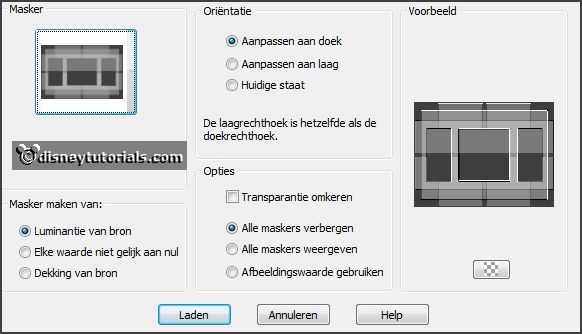
Layers - load/save mask - load mask from disk - look Emmymask18 -
with this setting.
3.
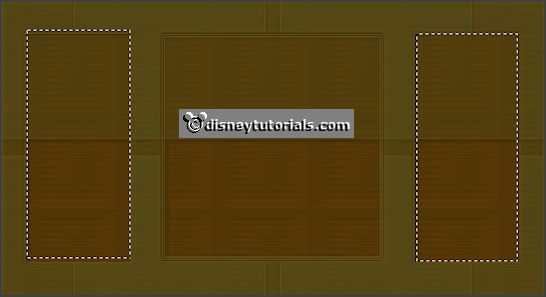
Activate selection tool - rectangle - and make a selection - as below.
Layers - new raster layer.
Activate the image herfst -
edit - copy.
Edit - paste as a new layer on the image.
Activate move tool - place this on the left selection.
Selections - invert - click at the delete key.
Selections - invert.
4.
Activate the image - image - mirror.
Edit - copy.
Edit - paste as a new layer on the image.
Place this on the right selection.
Selections - invert - click at the delete key.
Selections - select none.
Layers - merge - merge down.
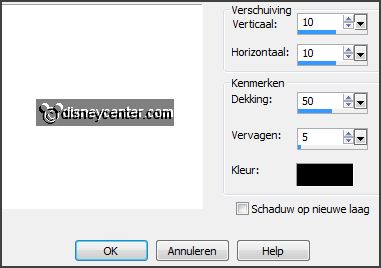
Effects - 3D Effects - drop shadow -
with this setting.
5.
Layers - duplicate.
Image - resize 110% - all layers not checked.
Layers - arrange - move down.
Adjust - blur - Gaussian blur - radius 20.
Effects - Texture effects - Mosaic glass -
with this setting.
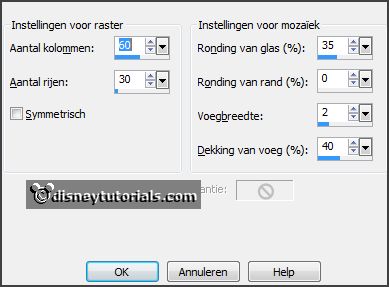
Effects - Edge effects - enhance.
6.
Activate selection tool - rectangle - and make a selection - as below.
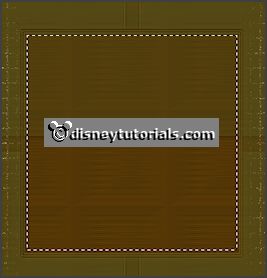
Layers - new raster layer.
Fill the selection with the foreground color.
Effects - Texture effects - Texture - 1&k2 -
setting is right.
Effects - 3D Effects - drop shadow - setting is right.
Selections - select none.
7.
Activate the tube cheer -
edit - copy.
Edit - paste as a new layer on the image.
Effects - 3D Effects - drop shadow -
with this setting.
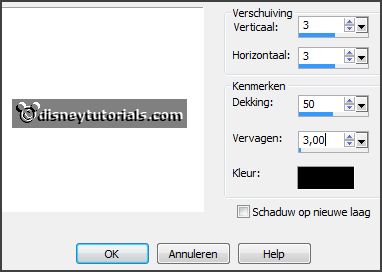
Layers - merge - merge all visible layers.
8.
Image - resize 85% - all layers not checked.
Layers - new raster layer.
Make from the foreground a gradient radial -
with this setting.
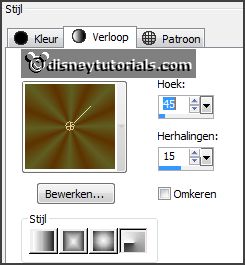
Fill the layer with the gradient.
Layers - arrange - move down.
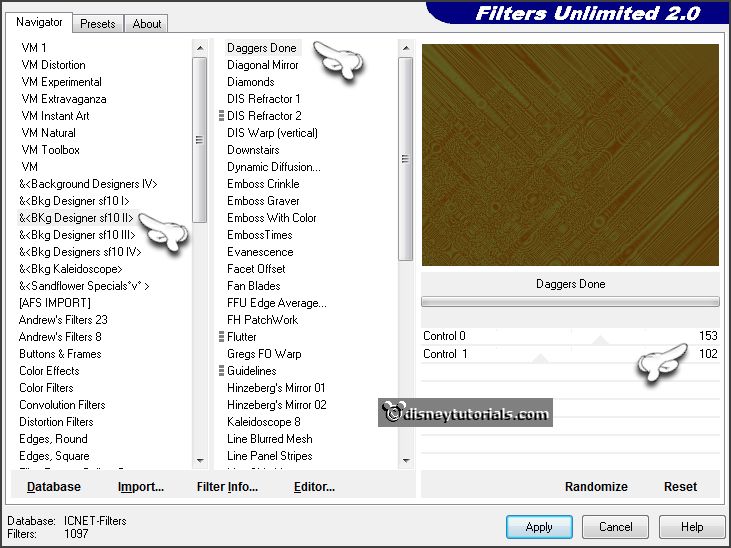
Effects - plug-ins - I.C.NET Software - Filters Unlimited 2.0 - &<Bkg Designer
sf10 11 - Daggers Done -
with this setting - click OK.
9.
Activate the top layer.
Effects - 3D Effects - drop shadow -
with this setting.

Repeat the drop shadow - now with vert.- and horz. at -10.
10.
Activate the bottom layer.
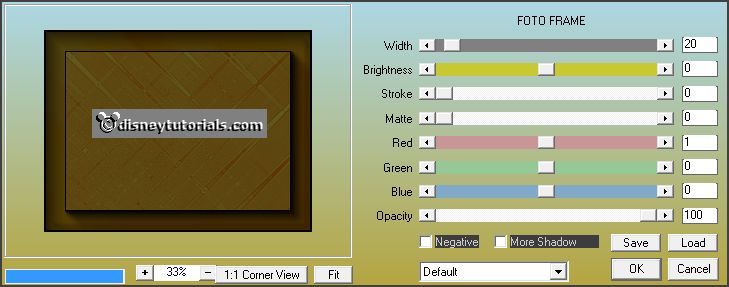
Effects - plug-ins - AAA Frames - Foto frames -
with this setting -
click OK.
Layers - new raster layer - put your watermark into the image.
Image - add borders 1 pixel - color black.
11.
Activate the tube donald -
edit - copy.
Edit - paste as a new layer on the image.
Place this left at the bottom - see example.
Effects - 3D Effects - drop shadow - setting is right (-10).
12.
Activate the tube blinkie - edit - copy.
Edit - paste as a new layer on the image.
Place this right at the bottom - see example.
Layers - merge - merge all layers.
13.
Image - resize 85% - all layers checked.
File - export - JPEG Optimizer.