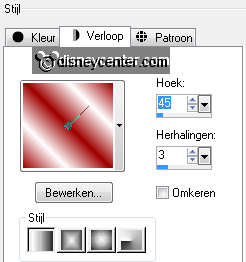
Foreground colorr #a00000 and background color white.
1.
Open new transparent image 800x600
Fill this with gradient linear - with this setting.
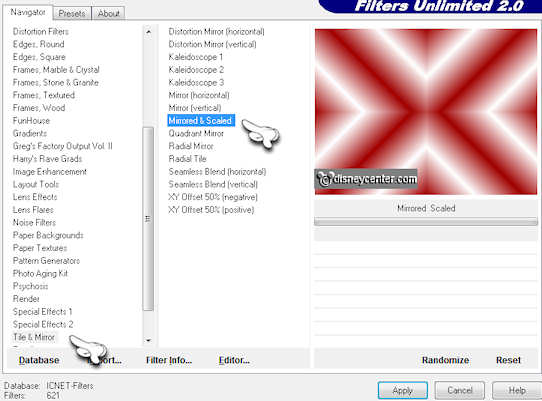
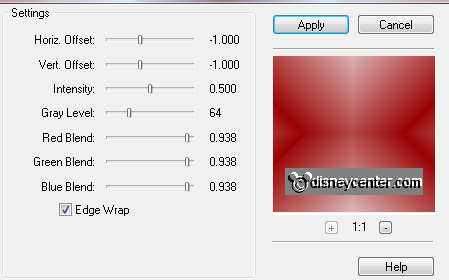
Effects - Filter Unlimited 2.0 - Tile & Mirror - Mirrored & Scaled -
with this setting
2.
Effects - Edge Effects - enhance.
Effects - FM Tile Tools - Blend Emboss - with this setting.
Duplicate this layer - image - free rotate right 90.
3.
Duplicate this layer - image - resize 85% - all layers not
checked.
Duplicate this layer - image - resize 85% - all layers not checked.
Layers - merge - merge all visible.
Effects - Edge Effects - enhance more.
4.
Duplicate this layer.
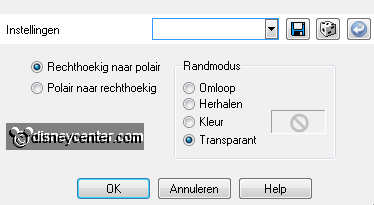
Effects - Distortion Effects - Polor Coordinates - with this
setting.
Set the opacity of this layer at 35.
Layers - merge - merge down.
5.
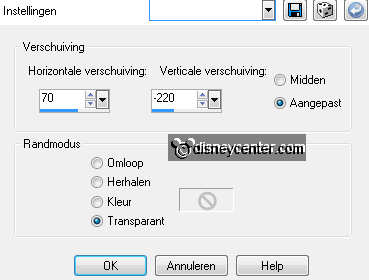
Copy microodwit and paste as a new layer on the image.
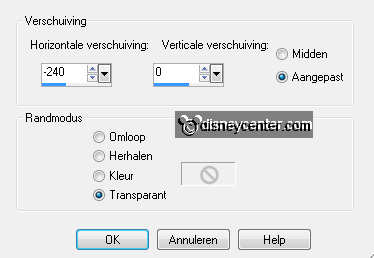
Effects - Image Effects - Offset - with this setting.
Duplicate this layer - Effects - Distortion Effects - wind - from
right 100.
6.
Layers - arrange - move down.
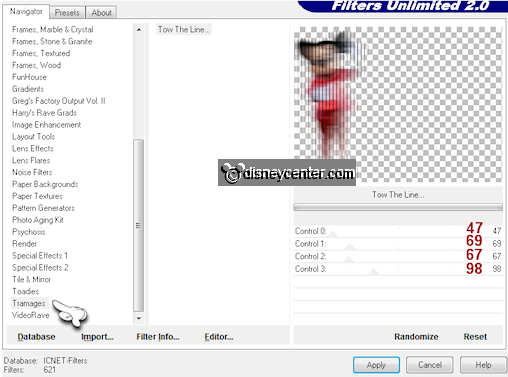
Effects - Filter Unlimited 2.0 - Tramages - Tow the Line - with this
setting.
Make the top layer active.
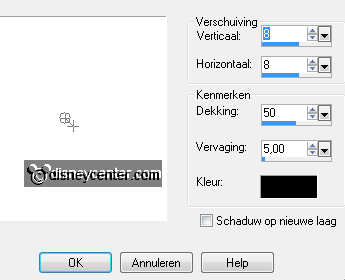
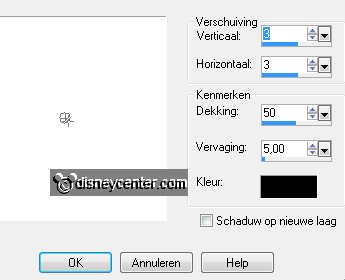
Effects - 3D Effects - drop shadow - with this setting.
7.
Copy word-art-ValentineChoice and paste as a new layer on the
image.
Effects - Image Effects - Offset - with this setting.
Effects - 3D Effects - drop shadow - with this setting.
Layers - merge - merge all layer.
8.
Image - add border - symmetric - 25 pixels - color black.
Select the black border - new raster layer - fill this with the
foreground color.
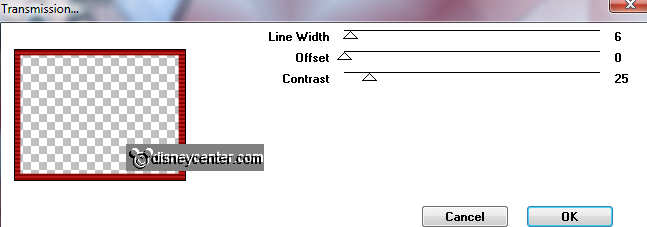
Effects - VM Extravaganza - Transmission - with this setting.
Effects - FM Tile Tools - Blend Emboss - with the same setting as in
point 2.
9.
Selections - select none.
New raster layer - put your watermark into the image.
Layers - merge - merge all layer.
10.
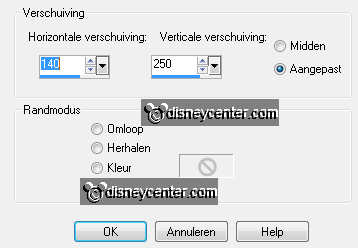
Copy word-art-choose and paste as a new layer on the image.
Effects - Image Effects - Offset - with this setting.
Give the same drop shadow as in point 7.
11.
Selections - Load/save selection - load selection from disk -
look emmyvalentine - with this setting.
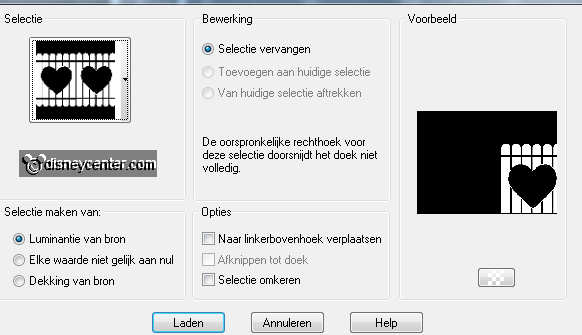
New raster layer -fill this with the background color (white).
Selections - select none.
12.
Select with the magic wand the left heart.
Copy minnie and paste as a new layer ON the selection.
Selection - invert - click on the delete key - selection - invert.
13.
Duplicate this layer twice. Lock the 2 top layers.
Make raster 3 active.
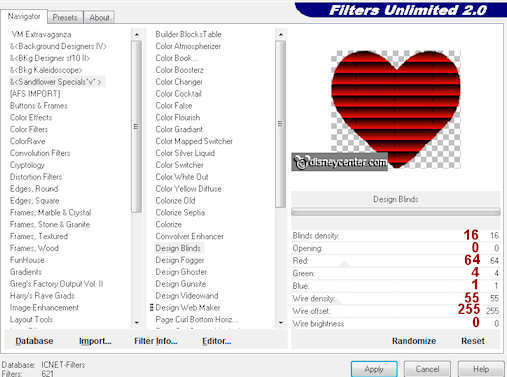
Effects - Filter Unlimited 2.0 - &<Sandflower Specials 'v'> -
Designs Blinds - with this setting.
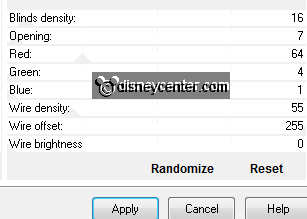
Lock raster 3 and open the copy of raster3.
Repeat Sandflower - with this setting.
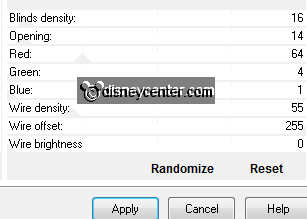
Lock copy of raster 3 and open copy(2) of raster3.
Repeat Sandflower - with this setting.
Selections - select none.
14.
Make raster 1 active - and select the right heart.
Copy pluto and paste as a ne layer ON the selection.
Selection - invert - click on the delete key - selection - invert.
15.
Duplicate this layer twice. Lock the top 2 layers.
Make raster 4 active.
Effects - Filter Unlimited 2.0 - &<Sandflower Specials 'v'> - with
the same setting as in point 13.
Lock raster 4 and open the copy of raster4.
Repeat Sandflower - with the same setting as in point 13.
Lock copy of raster 3 and open copy(2) of raster3.
Repeat Sandflower - with the same setting as in point 13.
Selections - select none.
16.
Make raster 1 active.
Give the same drop shadow as in point 7.
Layers - arrange - bring to top.
Image - resize 75% - allall layers checked.
17.
ZLock the copy layers of raster 3 and 4 and make the bottom
layer active.
Edit - copy merged.
Open animation shop - paste as a new animation.
18.
Back in PSP - Lock raster 3 and 4 and open the copy layers of raster3
and 4.
Edit - copy merged.
Back in AS - paste after active frame.
19.
Back in PSP - Lock copy layers raster 3 and 4 and open
the copy(2) layers of raster3 and 4.
Edit - copy merged.
Back in AS - paste after active frame.
20.
Animation - Frame properties.
Set frame 1 at 100 - frame 2 at 50 - frame 3 at 150
File - save as - give name - click 3 times at next and than at
finish.