Now we make the gradient
5. Go to your materials
palette.
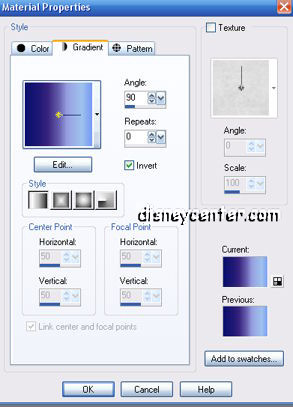
6. Click on edit - new - and
give the gradient a name. OK
7. Click on the first bottle
and change the color in the custom box.
8. Change the location 0% to
20%. (see below)
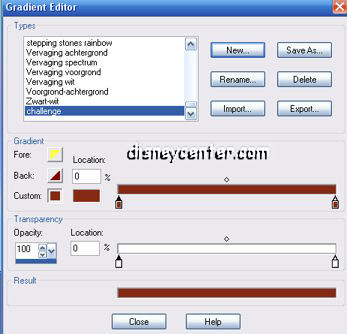
9. Click next to the first
bottle and change the color again also the location.
10. Follow this till the
location is 100%. You can use 3, 5 or more colors. It's up to you.
I use it 5
times in pastel colors.
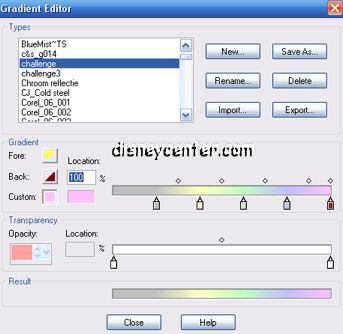
11. Close the editor when it is
ready.
The misted tube and the gradient are finished. Now we are making the tag.
12. Open a new raster image
400x400 transparent.
13. Search for your gradient in
the material palette.
14. Fill the image with the
gradient - Sunburst - repeat 10, invert unchecked.
15. Go to Effects - Reflection Effects - Kaleidoscope.
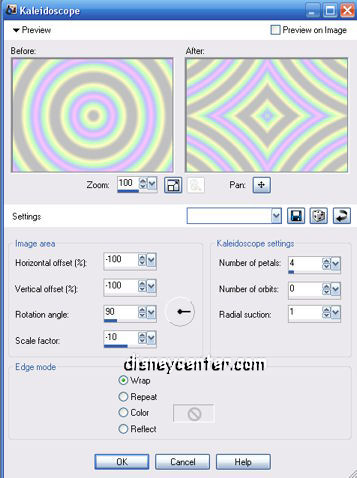
16. Selection - Select all - Modify- Contract 25. OK
17.
Add a new raster layer.
18.
Fill this with a light color of your misted tube.
19.
Effects - 3D Effects- Drop Shadow.
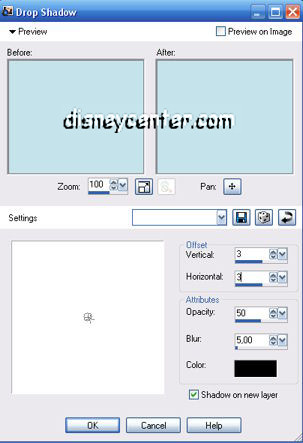
20.
Repeat the Drop Shadow, but now with H & V -3.
21.
Selection none.
22.
Copy and paste your misted tube as a new layer.
23.
Merge all flatten.
24. Go to your text tool. My font is Hobe Std. 48 vector.
Type your text.
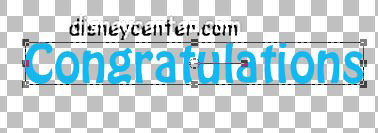
25.
Holding the ctrl key and move the top left node upstairs.
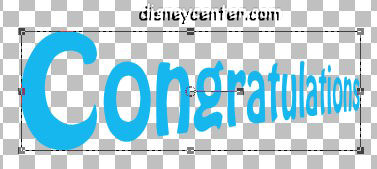
26.
Again holding the ctrl key and now move the bottom right node a little upstairs.
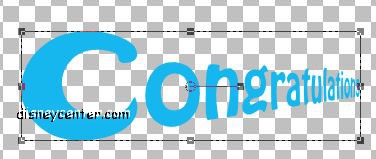
27.
If your are content with this, convert to raster layer.
28.
Give it a Inner bevel.
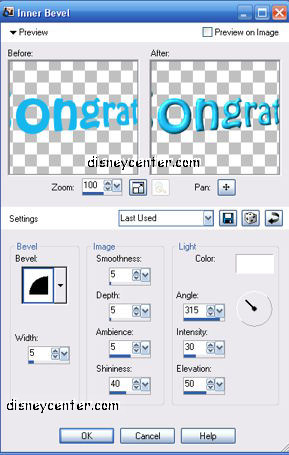
29.
Add your watermark or your name.
30.
Merge all flatten.
31.
Image - add border 3 light color of your misted tube.
32.
Add border 20 with another light color that match your image.
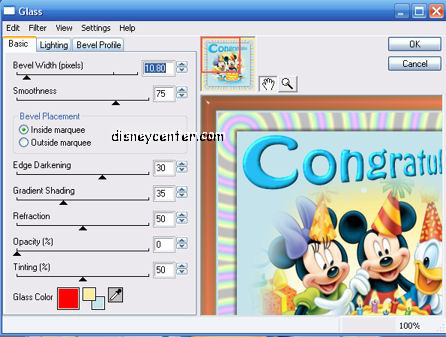
33.Go to your magic wand tool and select this border. Tolerance and feather at 0
34.Go to Effects - Eye Candy 4000-Glass with this setting
.
35.
Selection none.
36.Image - resize to 350x350. Resize all layers checked.
And the tag is finished.
