Foreground color #3b68cf and background
color #e7e8ea
1
Open new image 500x400 - Fill this with gradient linear.
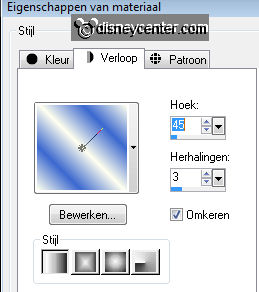
Duplicate this layer - image - mirror - Put the opacity of this layer at 50
Layers - merge - merge down
Adjust - Blur - Gaussian blur at 27.
2
Copy the tube Donald Duck 112 and paste as a new layer.
Effects - Texture Effects - Texture - Mosaic Antique with this setting.
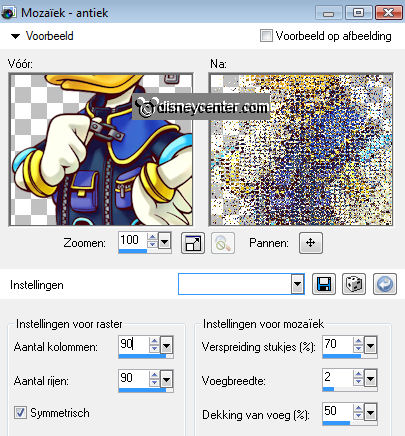
Put the opacity of this layer at 43.
3
Go to selection tool - selection - rectangle - Pull a rectangle of
20x360
New raster layer - fill this with the foreground color.
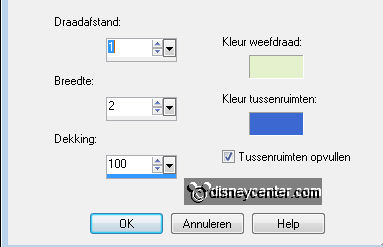
Place this left - 20 pix. of the left- top- and bottom.
Effects - Texture Effects - Weave - with this setting.
Effects - 3D Effects - drop shadow with this setting.
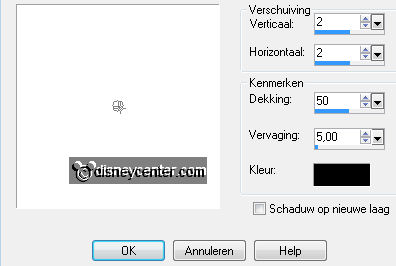
Repeat the drop shadow, but now horz.- and vert. at -2.
4
Duplicate this layer - Image - Resize 85% - resize all layers not checked.
Duplicate this layer - Image - Resize 85% - resize all layers not checked.
Duplicate this layer - Image - Resize 85% - resize all layers not checked.
5
Copy the tube Donald Duck 112 and paste as a new layer.
Image - Resize 85% - resize all layers not checked.
Give the same drop shadow as in point 3 - Duplicate this layer - Activate raster
4
Effects - Distortion Effects - Wind - from left - wind strength 100.
6
Open the scrapkit pspplus_006.
Copy frame - and paste as a new image.
Go to selection tool - selection - rectangle - Pull a rectangle in the middle of
the frame.
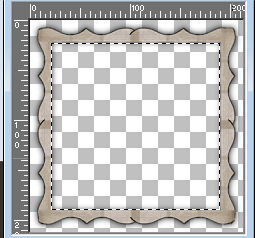
Click at the delete key of your keyboard. Select none.
Copy the frame - and paste as a new layer on the image.
Adjust - Hue and Saturation - Colorize.
Place this at the second rectangle see below.
7
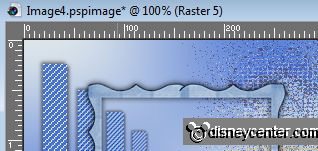
Select in the frame - selections - modify - expand 4.
New raster layer - fill this with the background color.
Effects - Texture Effects - Texture - Diagonal Strokes- with this setting.
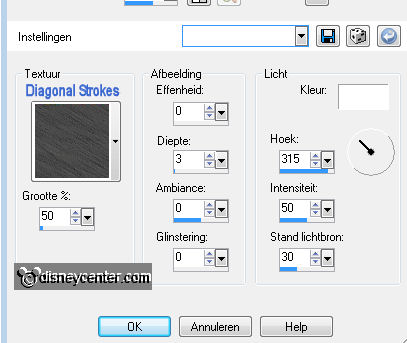
Layers - arrange - move down.
8
Copy vaas1 and paste as a new layer.
Adjust - Hue and Saturation - Colorize - as in point 6.
Place this in the frame at the border.
Give the same drop shadow as in point 3
9
Copy vaas3 and paste as a new layer.
Adjust - Hue and Saturation - Colorize - as in point 6.
Place this in the frame at the border near the other.
Give the same drop shadow as in point 3
10