|

This
Tutorial is copyrighted to the Tutorial Writer, © Emmy Kruyswijk
03-01-2013.
This Tutorial
may
not be forwarded, shared or otherwise placed on any Web Site or group without written
permission from
Emmy Kruyswijk.
Many of the material are made by me.
Please respect my work and don't change the file names.
At all Disney creations must be copyrighted.
Do you want to link my lessons?
Please send
me a mail.
Needing:
1 tube, 1 selection, 1 silver pattern - made by me.
2 tube
and 2 pattern unknown.
Before you begins......
Open the tubes in PSP,
Set the selection in the
folder selections and the patterns in the folder patterns.
Material

Be Mine

1.
File - open new transparent image
700x550
Set in the material palette the foreground on #a22336
and the background on #ceaeb9.
Make from the foreground a gradient radial - with this setting.
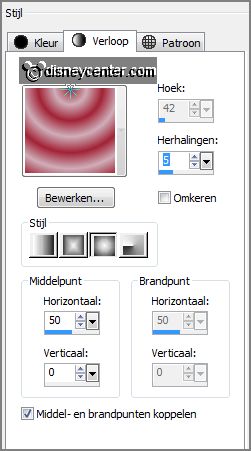
2.
Activate flood fill tool - fill the layer with the gradient.
Effects - plug-ins - Almathera - A Puddle - with this setting.
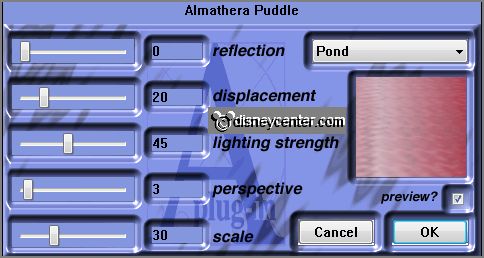
3.
Layers - new raster layer.
Selections - loas/save selection - load selection from disk -
look Emmyvalentijnhart - with this setting.
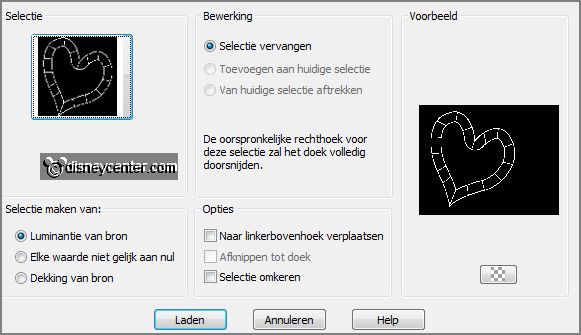
Set in the material palette the background on the silver pattern -
angle 0 - scale 100.
Fill the selection with the silver pattern.
Selections - select none.
4.
Activate the magic wand - with setting below - select to and to
begin by the 1 - see below.

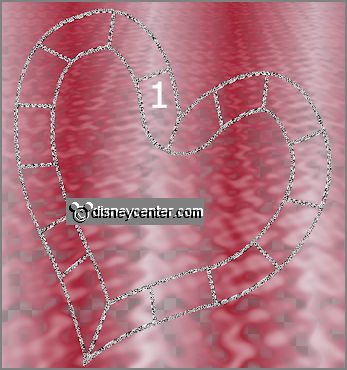
Layers - new raster layer.
Change in the material palette the background silver pattern in
redglass - setting is right.
Fill the selection with the pattern.
Selections - select none.
5.
Make raster 2 active and select the other boxes.
Layers - new raster layer.
Change in the material palette the background redglass in pinkglass
- setting is right.
Fill the selection with the pattern.
6.
Make raster 2 active.
Effects - 3D Effects - Inner bevel - with this setting.
(preset metaliek).
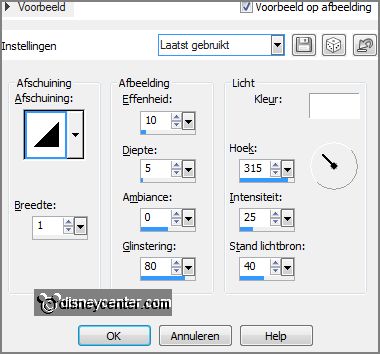
Lock the bottom layer and make 1 of the other layers active.
Layers - merge - merge all visible.
7.
Effects - 3D Effects - drop shadow - with this setting.
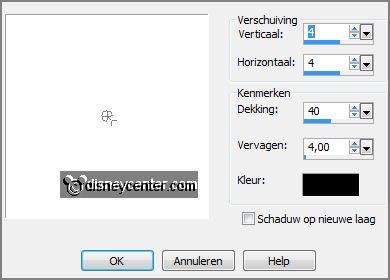
Layers - duplicate.
Image - resize 50% - 1 more time75% - all layers not checked.
Activate move tool - move the heart in the right upper corner - see
example.
8.
Layers - duplicate.
Image - resize 65% - all layers not checked.
Place this heart a little down - see example.
9.
Activate the tube Red Berry Bonsai - edit - copy.
Edit - paste as a new layer on the image.
Place this right at the bottom - see example.
Effects - 3D Effects -drop shadow - setting is right.
10.
Activate the tube Mickie-Minnie02_RmA - edit - copy.
Edit - paste as a new layer on the image.
Effects - Image effects - offset - with this setting.
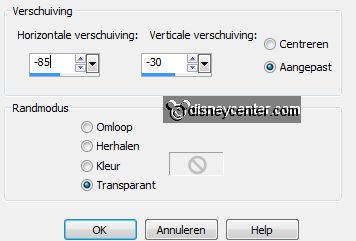
Effects - 3D Effects -drop shadow - setting is right.
11.
Layers - new raster layer - put your watermark into the image.
Layers - merge - merge all.
Effects - plug-ins - AAA Filters - Foto frame - with this setting.
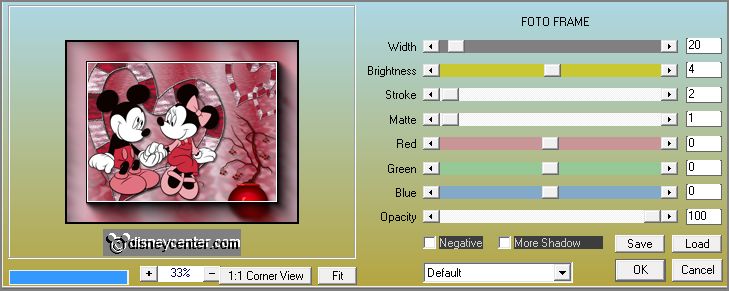
12.
Activate the tube Be Mine - edit - copy.
Edit - paste as a new layer on the image.
Place this in the middle at the top- see example.
Edit - paste as a new layer on the image - (is still in memory).
Place this left at the bottom.
13.
Layers - merge - merge all.
File - export - JPEG Optimizer.
Ready is the tag
I hope you like this tutorial.
greetings Emmy
Tested by Nelly

Tutorial written 03-01-2013.
|