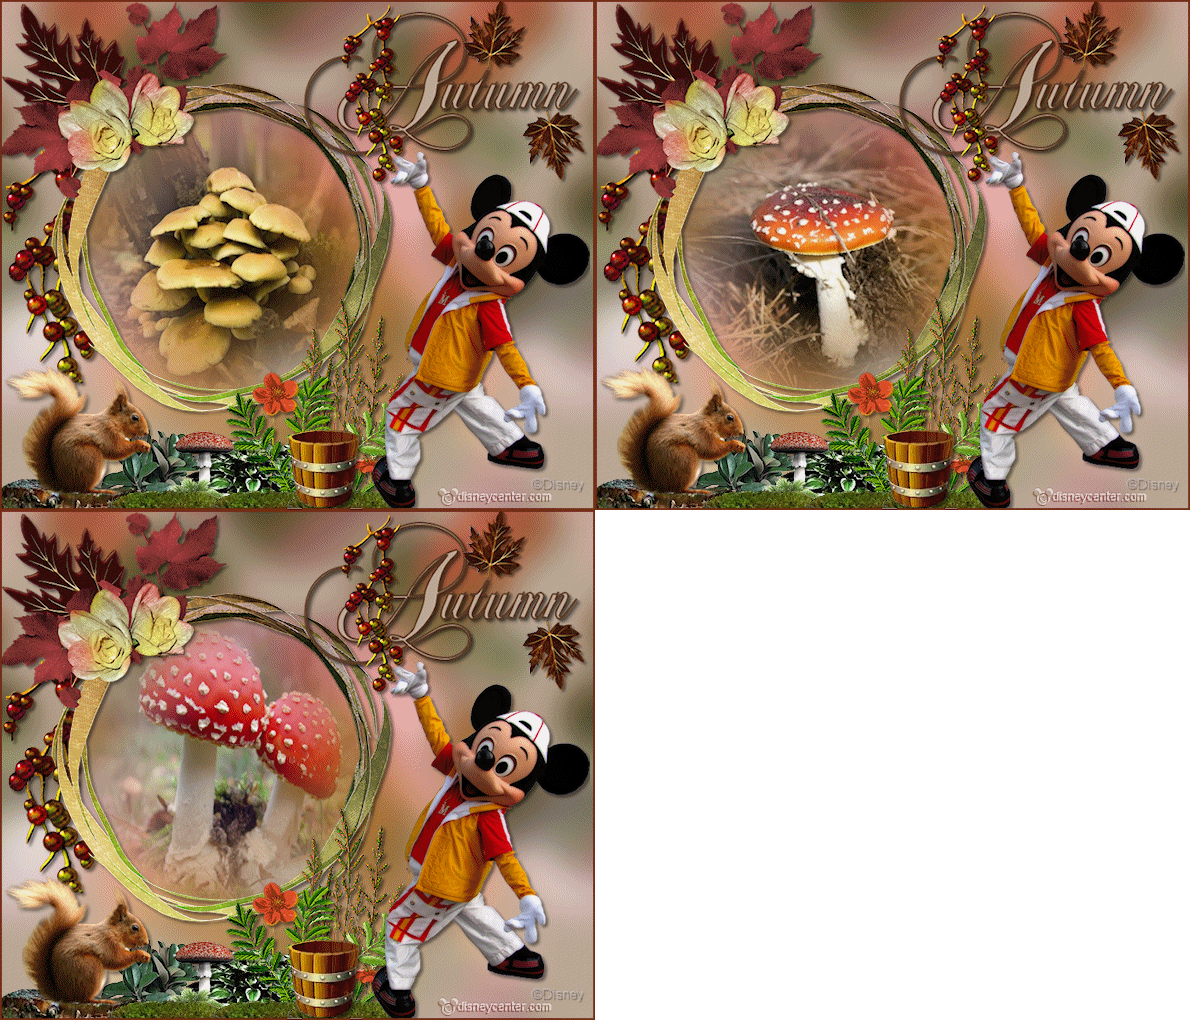
|

This
Tutorial is copyrighted to the Tutorial Writer, © Emmy Kruyswijk October 2011.
This Tutorial
may
not be forwarded, shared or otherwise placed on any Web Site or group without written
permission from
Emmy Kruyswijk
Do you want to link my lessons?
Please send
me a mail.
Materials

9 tubes and 1 word-art made by me, 2
tubes from Julia, 1 scrapkit from Nanly,
download here
(Télécharger ici/here)
Before you
begins..........
Open your tubes, word-art and scrapkit in PSP
This lesson is translated in
 by
Hélène by
Hélène Autumn

Foreground color #bbaa97 and background color #752814
1.
Open new transparent image 700x600.
Fill this with the foreground color.
Open de scrapkit Freebie rouge automne-by-nanly.
Copy Nanly_Freebie_Element_41 and paste as a new layer on the image.
Duplicate this layer - Image - mirror
Layer - merge - merge all.
Adjust - blur - Gaussian blur - radius 20.
2.
Open from the scrapkit Nanly_Freebie_Element_13 - image - resize
50% - and 1 time 70% - all layer checked.
Copy this element and paste as a new layer on the image.
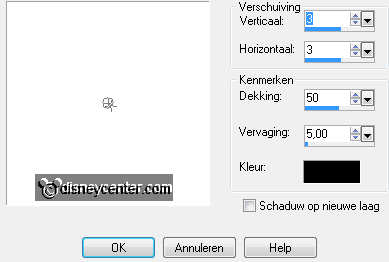
Effects - 3D Effects - drop shadow with this setting.

3.
Open TJ_Leaves and seeds_334.
Copy layer 6 and paste as a new layer on the image.
Give the same drop shadow as in point 2.
Place this at the left side - see example.
Layers- arrange - move down.
4.
Copy layer2 and paste as a new layer on the image.
Image -resize - 75% - all layers not checked.
Give the same drop shadow as in point 2.
Place this left at the top of the wreath - see example.
Layers- arrange - move down.
5.
Copy eekhoornopstronk and paste as a new layer on the image.
Place this left at the bottom.
Give the same drop shadow as in point 2.
Copy vasteplant and paste as a new layer on the image.
Place this in the middle at the bottom.
Give the same drop shadow as in point 2.
6.
Copy plant1 and paste as a new layer on the image.
Image -resize - 50% - all layers not checked.
Place this near the squirrel.
Give the same drop shadow as in point 2.
Layers- arrange - move down.
7.
Copy paddestoel and paste as a new layer on the image.
Image -resize - 75% - all layers not checked.
Place this near plant1 - not total at the bottom.
Give the same drop shadow as in point 2.
8.
Copy pontilla and paste as a new layer on the image.
Place this near the vasteplant.
Give the same drop shadow as in point 2.
Copy sali and paste as a new layer on the image.
Place this near the pontilla.
Layers- arrange - move down.
Give the same drop shadow as in point 2.
9.
Copy mos and paste as a new layer on the image.
Place this at the bottom left - 130 pixels from the side.
Give the same drop shadow as in point 2.
Duplicate this layer twice. Place them near each other. see example.
10.
Copy houtenemmer and paste as a new layer on the image.
Place this at the end of the mos.
Give the same drop shadow as in point 2.
11.
Copy micsport and paste as a new layer on the image.
Image -resize - 85% - all layers not checked.
Place this at the right side.
Layers- arrange - move down.
12.
Copy word-art-autumn and paste as a new layer on the image.
Image -resize - 90% - all layers not checked.
Place this at the top right.
Give the same drop shadow as in point 2.
13.
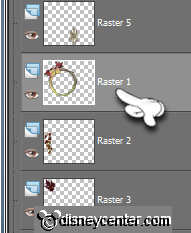
Lock the top layer and the 2 bottom layers and make raster1
active.

Click with the magic wand in the middle of the wreath.

Selections - modify - expand 7.
14.
New raster layer.
Copy paddestoelen and paste into selection.
Let selection stay - lock this layer.
New raster layer.
Copy paddestoelen1 and paste into selection.
Let selection stay - lock this layer.
New raster layer.
Copy paddestoelen2 and paste into selection.
15.
Open all layers.
New raster layer - put your watermark into the image.
Selections - select all - selections - modify - contract 2.
Selections - invert - fill this with the background color.
Image - resize 85% - all layers checked.
16.
Make the bottom layer active.
Lock the layers of the padestoelen1 en 2.
Edit - copy merged.
17.
Open animation shop - paste as a new animation
Back in PSP - Lock the layer paddestoelen and open layer
paddestoelen1
Edit - copy merged.
Back in AS - paste after active frame.
Back in PSP - Lock layer paddestoelen1 and open layerpaddestoelen2
Edit - copy merged.
Back in AS - paste after active frame. The last frame must be always
selected..
18.
Edit - select all.
Animation - Frame properties at 125.
File - Save As - give name - click on the following three times and
then finish.
Ready is the tag
I hope you like this tutorial.
greetings Emmy,
Tested by Bep

Tutorial written
30-10-2011
| 
