1.
File - open new transparent image 700x500.
Set in the material palette the foreground color at #a51e25
and the background color at #576041.
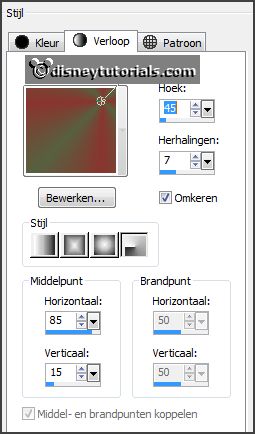
Make from the foreground a gradient radial - with this setting.
2.
Activate flood fill tool - fill the layer with the gradient.
Layers - duplicate.
Image - mirror.
Set in the layer palette the opacity to 50.
Layers - merge - merge down.
3.
Layers - duplicate.
Image - flip.
Set in the layer palette the opacity to 50.
Layers - merge - merge down.
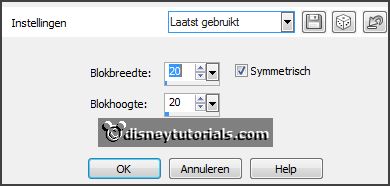
Effects - Distortion effects - Pixelate - with this setting.
Effects - Edge effects - enhance more.
4.
Layers - new raster layer.
Fill the layer with the background color.
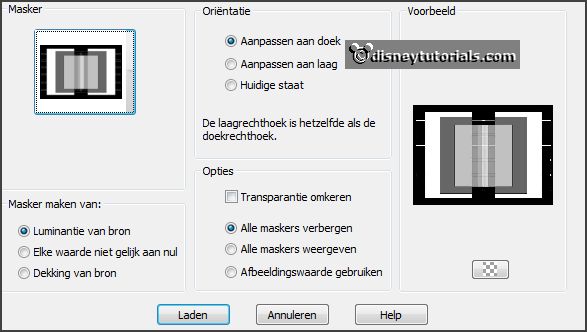
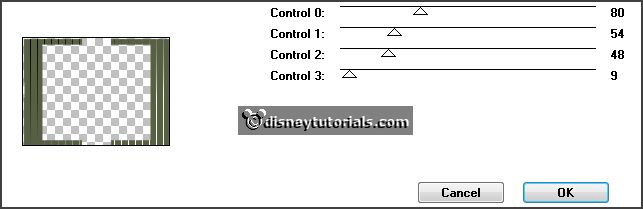
Layers - load/save mask - load mask from disk - look Emmymask9 - with this
setting.
Layers - merge - merge down.
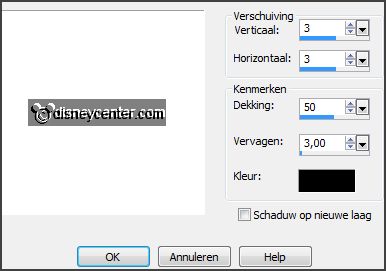
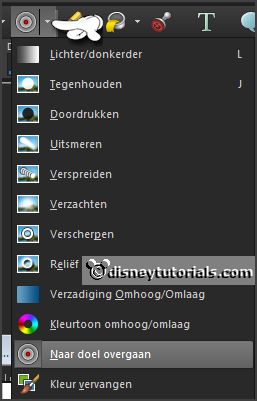
Effects - 3D Effects - drop shadow - with this setting.
5.
Activate the magic wand - with setting below - select as below.

Promote layer to selection.
Effects - plug-ins - Tramages - Tow the Line - with this setting - click
OK.
Selections - select none.
6.
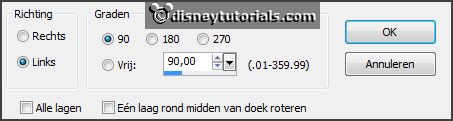
Layers - duplicate.
Image - free rotate - with this setting.
Activate pick tool - and pull a little out to the left and right.
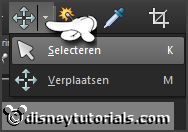
Set pick tool back to move tool.
Effects - Image effects - seamless tiling - default setting.
7.
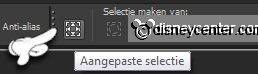
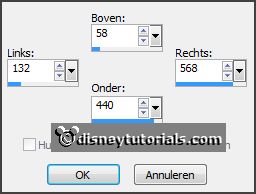
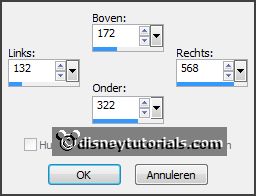
Activate selection tool - custom selection - with this setting.
Layers - new raster layer.
Set in the material palette the foreground back to color - now #89352e.
Fill the selection with the foreground color.
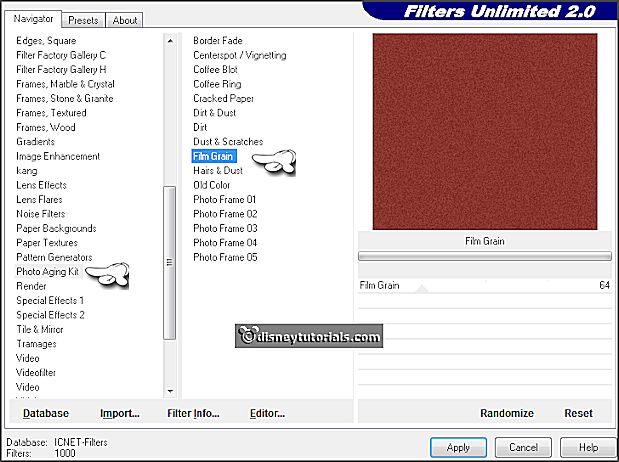
Effects - plug-ins - I.C.NET Software - Filters Unlimited 2.0 - Photo Aging Kit
- Film Grain - with this setting - click Apply.
Selections - select none.
8.
Activate selection tool - custom selection - with this setting.
Layers - new raster layer.
Fill the selection with the background color.
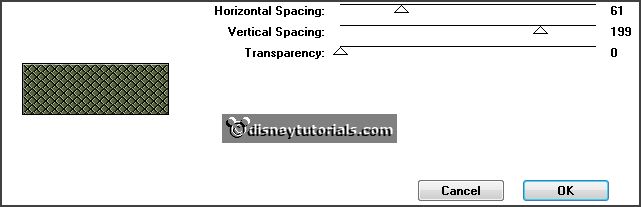
Effects - plug-ins - Tramages - Quilt - with this setting - click OK.
Selections - select none.
9.
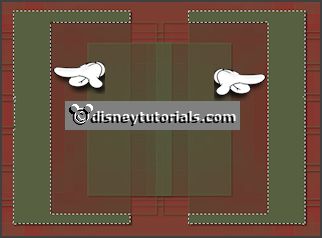
Activate the tube micmin3 - edit - copy.
Edit - paste as a new layer on the image.
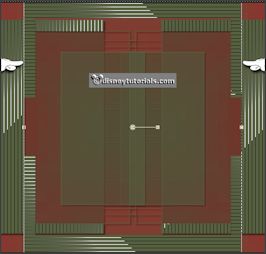
Activate move tool - put the tube right at the bottom - see example.
Effects - 3D Effects - drop shadow - setting is right.
10.
Activate the tube Liza tulpen - edit - copy.
Edit - paste as a new layer on the image.
Place the tube left at the bottom - see example.
I have colored in the vase. This can be done by adding the desired color for
ground-and then this tool.
Effects - 3D Effects - drop shadow - setting is right.
11.
Activate text tool - with this setting - lock the foreground.

Write - Ich liebe dich - convert to raster layer.
Effects - 3D Effects - drop shadow - setting is right.
Place this in the middle at the top - see example.
12.
Activate the tube deco-goud - edit - copy.
Edit - paste as a new layer on the image.
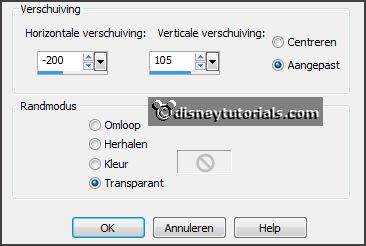
Effects - Image effects - offset - with this setting.
13.
Layers - duplicate.
Effects - Image effects - offset - with this setting.
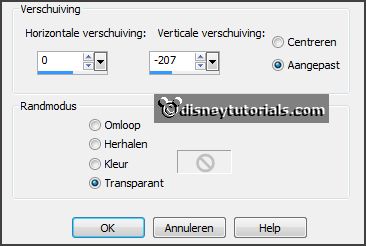
Layers - merge - merge down.
Effects - 3D Effects - drop shadow - setting is right.
14.
Edit - paste as a new layer on the image (stays in memory ).
Effects - Image effects - offset - with this setting.
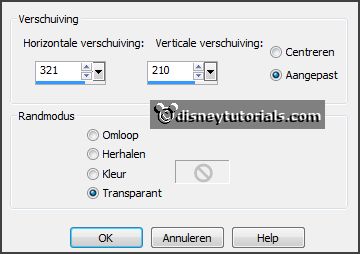
Layers - duplicate.
Effects - Image effects - offset - with this setting.
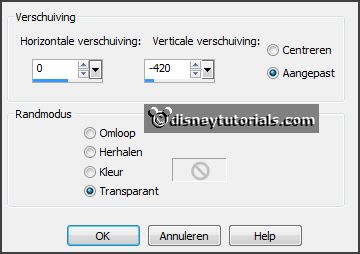
Layers - merge - merge down.
Effects - 3D Effects - drop shadow - setting is right.
15.
Layers - new raster layer - put your watermark into the image.
Image - add border 3 pixels - symmetric - background color.
Image - add border 30 pixels - symmetric - foreground color.
Image - add border 3 pixels - symmetric - background color.
16.
Effects - plug-ins - AAA Frames - Foto Frame - with this setting - click
OK.
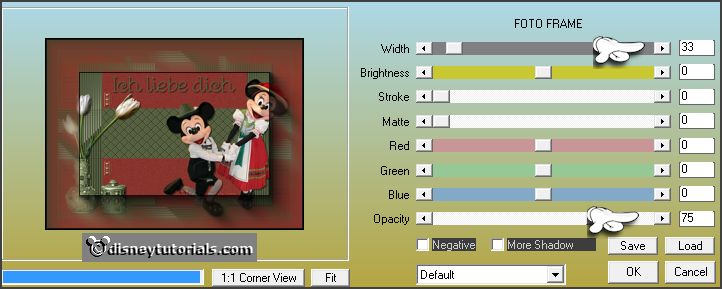
Repeat Foto Frame - now with width op 23 - others stay right.
Repeat Foto Frame - now with width op 13 - others stay right.
17.
Image - resize 90% - all layers checked.
File - export - JPEG Optimizer.


