|

This
Tutorial is copyrighted to the Tutorial Writer, © Emmy Kruyswijk 2011.
This Tutorial
may
not be forwarded, shared or otherwise placed on any Web Site or group without written
permission from
Emmy Kruyswijk
Do you want to link my lessons?
Please send
me a mail.
Materials:
download
here
2 Disney tubes, 3 misted tubes
van EllenPSP, 1 gold pattern, 1 font Tourist Trap
filters: FM Tile Tools - Blend Emboss.
Download
here
Before you begins.......
Filters : Install first your plug-ins before you open PSP and put
them in the folder plug-ins.
Open your image in PSP
Put the pattern in the folder patterns
Open the font and minimize
I Love Cats
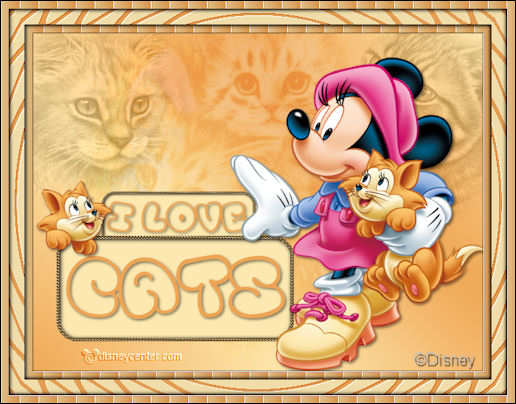
Foreground color #eea453 and background color #fce8b0
1.
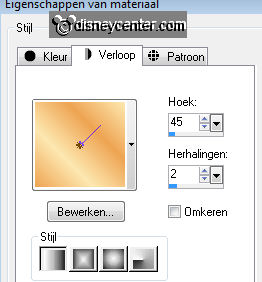
Open a new image 600x450.
Fill this with gradient linear with this setting.
Adjust - Blur - Gaussian Blur - Radius at 30.
2.
Copy epw-2005 and paste as a new layer.
Image - Resize 150% - resize all
layers not checked.
Place this in middle at the top. You can always move it.
Set the Blend mode of this layer - Soft Light.
Set the opacity at 62.
3.
Copy epw-2015 and paste as a new layer.
Place this left at the top.
Set the Blend mode of this layer - luminance (Legacy)
Set the opacity at 28.
4.
Copy epw-2010 and paste as a new layer.
Place this right at the top.
Set the Blend mode of this layer - luminance (Legacy)
Set the opacity at 32.
5.
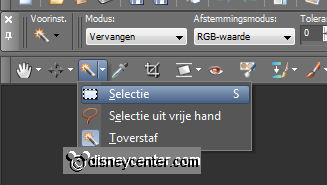
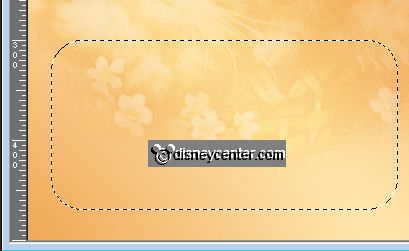
Go to selection tool- selection - rounded rectangle.
Pull a rectangle from about 350x150.
Place this as below
6.
New raster layer - fill this with the gold pattern - Angle 1 - Scale 100.
Selections - modify - contract 5.
New raster layer - fill this with the background color.
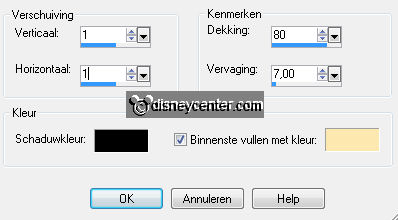
7.
Let selection stay.
Effects - 3D Effects - Cutout with this setting.
Repeat Cutout, but now witt -1.
Selections - select none.
8.
Layers - merge - merge down.
Duplicate this layer - Image - Resize 65% - resize all layers not checked.
Layers - Arrange - move down.
Move a little to the left.
9.
Go to text tool - font Tourist Trap - size 48 - color #eea453
- Lock the foreground color.

And write- I Love - Convert to raster layer.
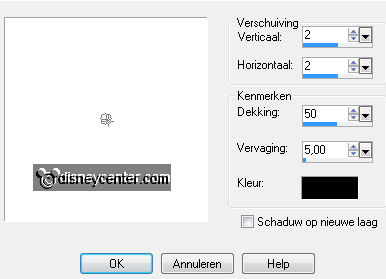
Effects - 3D Effects - drop shadow with this setting.
10.
Stay on the large rectangle.
Go to text tool again - size 100 - and write - Cats -
Convert to raster layer and give the same drop shadow as in point 9.
Place this in the middle of the rectangle.
Layers - merge - merge down.
11.
Copy MM_0000_Character Art and paste as a new layer.
Place this right - see example.
Give the same drop shadow as in point 9.
12.
Copy cat and paste as a new layer.
Place this on the top of the large rectangle at the left side.
Give the same drop shadow as in point 9.
13.
New raster layer - Put your watermark into the image.
Layers - merge - merge all layers.
14.
Image - add border 1 - color black.
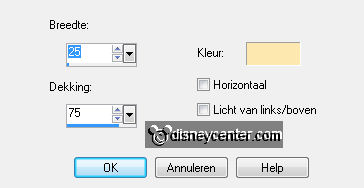
Image - add border 10 - background color #eea453.
Select the border - Effects - Texture effects - Blinds - with this setting.
Effects - FM Tile Tools - Blend Emboss - default setting.
Repeat the Blend Emboss.
Selections - select none.
15.
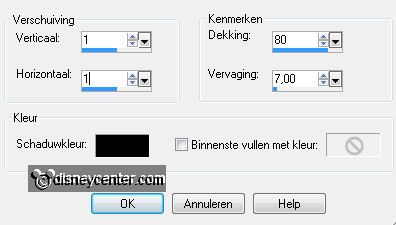
Selections - select all - selections - modify - contract 1.
Effects - 3D Effects - Cutout with this setting. (Fill interior with color not
checked )
Repeat Cutout, but now with -1.
Selections - select none.
16.
Image - add border 20 - background color #eea453.
Select the border - Effects - Distortion Effects - Ripple - with this setting.

Effects - FM Tile Tools - default setting.
Selections - select none.
17.
Repeat point 14.
Selections - select all - selections - modify - contract 11.
Repeat Cutout of
point 15, and Cutout -1.
Selections - select none.
Image - add border 1 - color black.
Image - Resize 75% - Resize all layers checked.
File - export - jpeg optimizer.
Ready is the tag
I hope you like this tutorial.
greetings Emmy,

Tutorial written
12-04-2011
|