Foreground color #a50000 and background
color #fbebf4
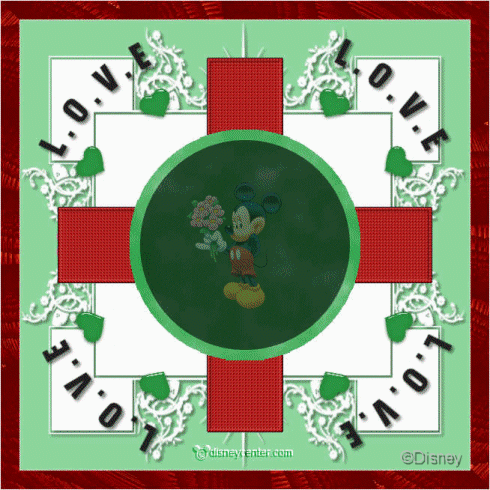
1. Open new image 600x600
2. Fill this with #90d89f.
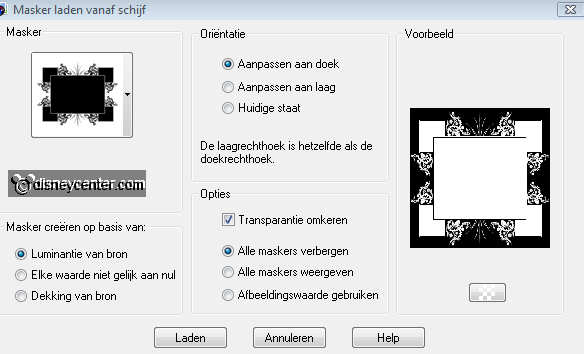
3. New raster layer - fill this with white.
4. Layers - Load/Save Mask - Load Mask from Disk with this setting.
5. Layers - merge - merge group.
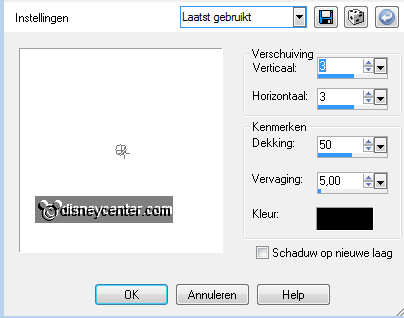
6. Effects - 3D Effects - drop shadow with this setting.
7. Copy WORDART and paste as a new layer.
8. Image - Resize 125% - Resize all layers not checked.
9. Give the same drop shadow as in point 6.
10. Copy REC2 and paste as a new layer.
11. Select REC2 and fill this with the foreground color.
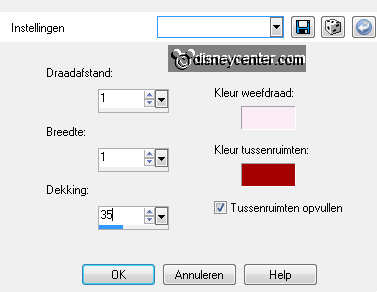
12. Effects - Texture effects - Weave with this setting.
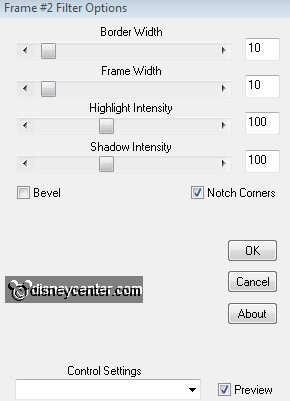
13. Effects - BorderMania - Frame 2 with this setting.
14. Selections - select none.
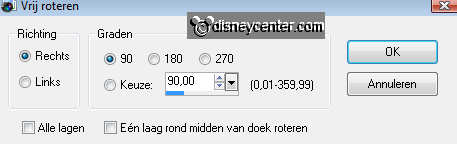
15. Duplicate this layer - Image - free rotate.
16. Copy L Circle and paste as a new layer.
17. Select the circle - fill with #35a74f o1 1 color from your tube.
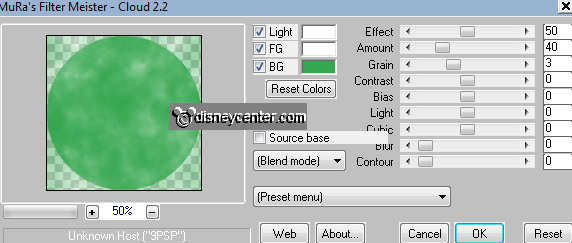
18. Effects - MuRa's Meisters - Clouds with this setting.
19. Selections - select none.
20. Copy S Circle and paste as a new layer. Set the opacity of this layer on 60.
21. Copy the hearts and paste as a new layer.
22. Image - Resize 120% - Resize all layers not checked.
23. Layers - Arrange - move down 4 layers ( below raster 3).
24. Select the hearts - fill this with the background color #fbebf4.
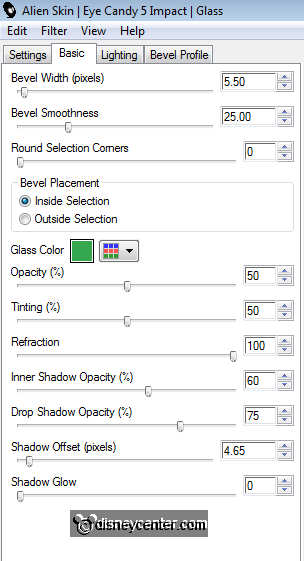
25. Effects - Alien Skin Eye Candy Impact - Glass with this setting.
26. Selections - select none.
27. New raster layer - put your watermark into the image.
28. Layers - merge - merge all.
29. Image - add border 1 - color white.
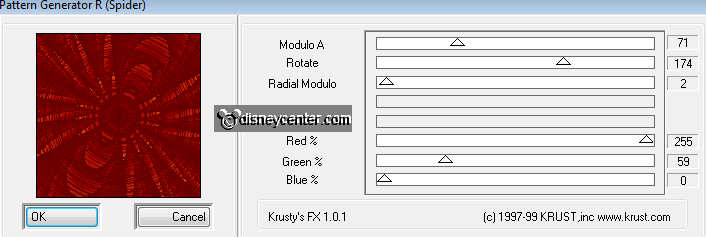
30. Image - add border 25 - foreground color.
31. Select the border - Effects - Krusty's FX Vol11 1.0 - Pattern Generation R
(Spider) with this setting.
32. Image - add border 1 - color white.
33. Copy the tube MM008 and paste as a new layer. Place this in the middle.
35. Duplicate this layer - Image - Resize 65% - Resize all layers not checked.
Set the opacity of the layer on 65.
36. Duplicate this layer - Image - Resize 65% - Resize all layers not checked.
Set the opacity of the layer on 30.
37. Lock the 2 middle layers - Stay at the bottom layer.
38. Edit - Copy merged
39. Open Animation shop - paste as a new animation.
40. Back in PSP - Lock the top layer - open the copy of raster 1
41. Edit - Copy merged
42. Back in animation shop - paste after current frame (Be sure the last frame
is always selected).
43. Back in PSP - Lock the copy of raster 1 - and open raster 1
44. Back in animation shop - paste after current frame.
45. Edit - Frame Properties - set the first 2 frames at 100and the last frame at
200.
46. File - save as - give name - click 3 times at next and than at finish.