1.
File - open new transparent image 700x700.
Activate the tube LOVE_by_Mago74 WA (5) -
edit - copy.
Edit - paste as a new layer on the image.
2.
Activate the tube LOVE_by_Mago74 ramka (7) -
edit - copy.
Edit - paste as a new layer on the image.
Effects - 3D Effects - drop shadow - with this setting.

3.
Activate raster 2.
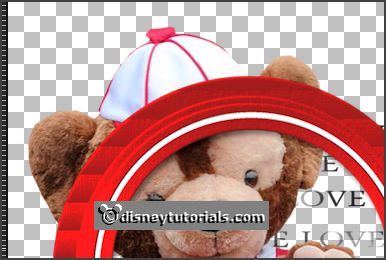
Activate the tube duffyval2 -
edit - copy.
Edit - paste as a new layer on the image.
Activate move tool - place the head - as below.

Activate the eraser - and erase the part under the frame.
Layers - duplicate.
Layers - arrange - up.
Erase here the part on the frame.
Effects - 3D Effects - drop shadow - setting is right.
4.
Activate the tube LOVE_by_Mago74 elem (66) -
edit - copy.
Edit - paste as a new layer on the image.
Place it at the bottom of the frame - see example.
Effects - 3D Effects - drop shadow - setting is right.
5.
Activate the tube LOVE_by_Mago74 elem (21) -
edit - copy.
Edit - paste as a new layer on the image.
Place it left at the bottom -
see example.
Effects - 3D Effects - drop shadow - setting is right.
6.
Activate the tube LOVE_by_Mago74 elem (40) -
edit - copy.
Edit - paste as a new layer on the image.
Place it left under the branch -
see example.
Layers - arrange - set it under raster 3.
Effects - 3D Effects - drop shadow - setting is right.
7.
Activate the tube LOVE_by_Mago74 WA (1) -
edit - copy.
Edit - paste as a new layer on the image.
Place it left at the bottom -
see example.
Effects - 3D Effects - drop shadow - setting is right.
8.
Activate the tube LOVE_by_Mago74 elem (34) -
edit - copy.
Edit - paste as a new layer on the image.
Place it right - above the flower of the frame frame -
see example.
Layers - arrange - set it under raster 3.
Effects - 3D Effects - drop shadow - setting is right.
9.
Activate the tube LOVE_by_Mago74 elem (15) -
edit - copy.
Edit - paste as a new layer on the image.
Place it right above the frame - see example. Be sure nothing coming out.
Layers - duplicate.
Move it down - see example.
Layers - merge - merge down.
Effects - 3D Effects - drop shadow - setting is right
10.
Layers - new raster layer - put your watermark into the image.
Layers - merge - merge all visible layers.
File - export - PNG Optimizer.
Ready is the tag
I hope you like this tutorial.
greetings Emmy