This
Tutorial is copyrighted to the Tutorial Writer, © Emmy Kruyswijk.
This Tutorial may not be forwarded, shared or otherwise placed on any Web Site
or group without written
permission from Emmy Kruyswijk.
Please respect my work and from others, don't change the file names.
Do you want to link my lessons?
Please send me a mail.
Needing:
I use parts of different scrapkits.
The poser tube is from me. You can see it
here.
If you use my tube ,,please put the copyright on it.
Before you begins.......
Open the tubes in PSP
Material

Be My Bunny

1.
Open new transparent image 800x800.
Open masker – copy - paste on the image.
2.
Open hekwerk - copy - paste on the image.
Place it at the bottom.
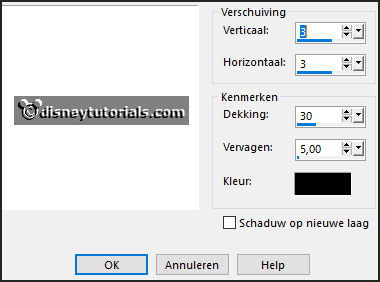
Give a drop shadow - with this setting.

3.
Open sekadadesign_earlyinthespring_element(4) - copy - paste on the image.
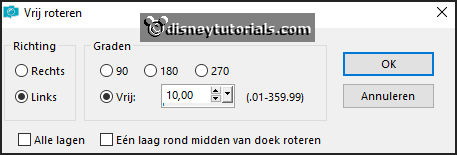
Image – free rotate – with this setting.

Place it left at the top.
Give the same drop shadow.
4.
Open Frame Background - copy - paste on the image.
Image – free rotate – setting is right.
Place it on the frame.
Layers - arrange - down.
5.
Open grass - copy - paste on the image.
Image – free rotate – setting is right.
Place it in the frame.
Give the same drop shadow.
Activate the top layer.
6.
Open kuikentje - copy - paste on the image.
Place it on the frame – see example.
Give the same drop shadow.
Layers – duplicate – image – mirror.
Place it at the other side of the frame.
7.
Open element47 - copy - paste on the image.
Place it right above the frame – see example.
Give the same drop shadow.
8.
Open vlinder - copy - paste on the image.
Place it right above the branches – see example.
Give the same drop shadow.
9.
Open Bunny3 - copy - paste on the image.
Place it left at the bottom.
Give the same drop shadow.
10.
Open y_easter73[1] - copy - paste on the image.
Place it in the middle at the bottom.
Give the same drop shadow.
11.
Open EWA7 - copy - paste on the image.
Place it under the frame.
12.
Open de poser tube - copy - paste on the image.
Place it at the right side.
Give the same drop shadow.
13.
Layers - new raster layer - set your watermark into the image.
Layers - merge - merge all visible layers.
File - export - PNG Optimizer.
Ready is the tag
I hope you like this tutorial.
greetings Emmy