Deze les is copyrighted aan de schrijfster Emmy Kruyswijk.

This
Tutorial is copyrighted to the Tutorial Writer, © Emmy Kruyswijk.
This Tutorial may not be forwarded, shared or otherwise placed on any Web Site
or group without written
permission from Emmy Kruyswijk.
Please respect my work and from others, don't change the file names.
Do you want to link my lessons?
Please send me a mail.
Needing:
I use parts of different scrapkits.
The poser tube is a buy tube of me. Is not by the material. You can buy it
here.
Before you begins.......
Open the tubes in PSP
Material

Autumn Orange

1.
Open new transparent image 800x800.
Open masker1 – copy - paste on the image.
Open masker – copy - paste on the image.
2.
Open frame Regina 2013 – copy - paste on the image.
Place it right at the top.
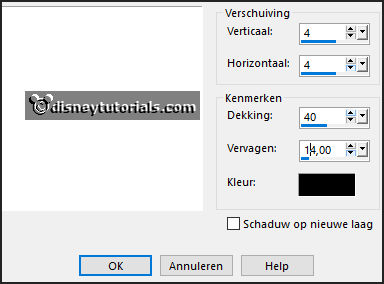
Effects – 3D effects – drop shadow – with this setting.

3.
Open framebgr – copy - paste on the image.
Place it on the frame.
Layers – arrange - down.
Activate the top layer.
4.
Open bloem – copy - paste on the image.
Place it at the bottom on the big frame.
Set the opacity of this layer to 28.
5.
Open lanterner – copy - paste on the image.
Place it at the top on the big frame.
Give the same drop shadow.
6.
Open el53 – copy - paste on the image.
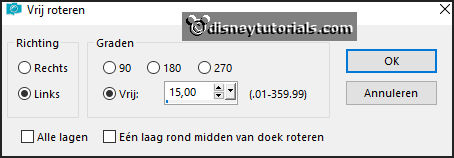
Image – free rotate – with this setting.

Place it right of the little frame.
Give the same drop shadow.
7.
Open autumn – copy - paste on the image.
Place it in the little frame.
8.
Open AutumnBreeze_MoleminaScrap_el28 – copy - paste on the image.
Place it left at the bottom.
Layers – duplicate – image - mirror.
9.
Open Grass – copy - paste on the image.
Place it left at the bottom.
Layers – duplicate – image - mirror.
10.
Open je poser tube - – copy - paste on the image.
Place it at the left side.
Give the same drop shadow.
11.
Open Cluster 03 – copy - paste on the image.
Place it left at the bottom.
Give the same drop shadow.
12.
Open el80 – copy - paste on the image.
Place it in the middle at the bottom.
Give the same drop shadow.
13.
Open herfst – copy - paste on the image.
Place it right at the bottom.
Give the same drop shadow.
12.
Layers - new raster layer - set your watermark into the image.
Layers - merge - merge all visible layers.
File - export - PNG Optimizer.
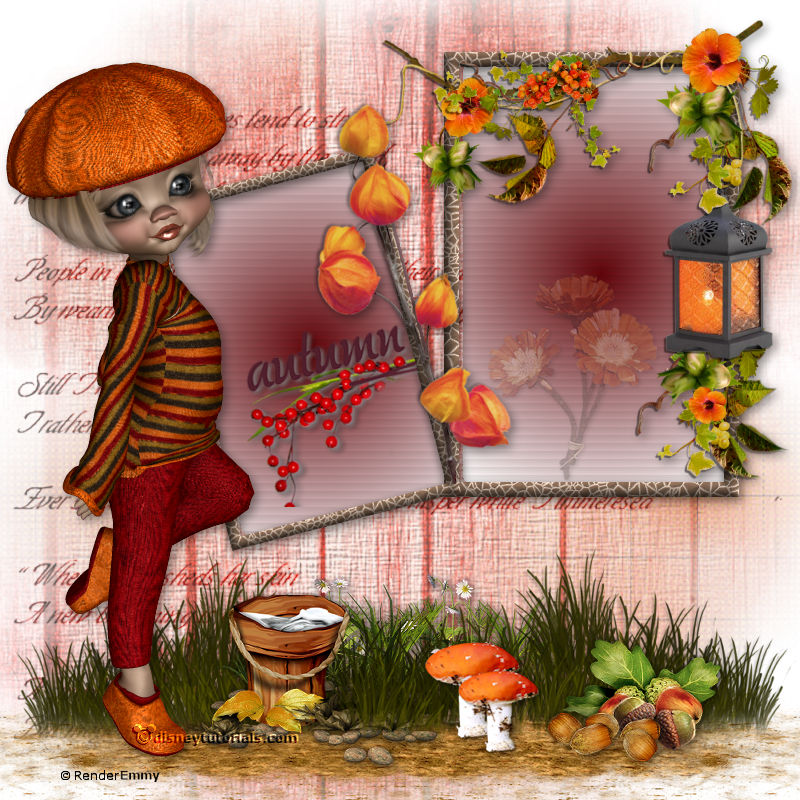
Ready is the tag
I hope you like this tutorial.
greetings Emmy