Foreground color white and background color #1c3f05
1.
Open new transparent image 700x550.
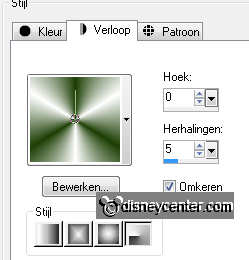
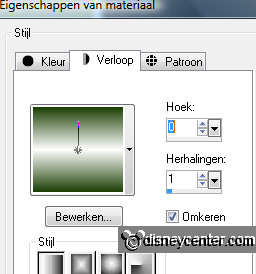
Fill this with gradient radial - with this setting.
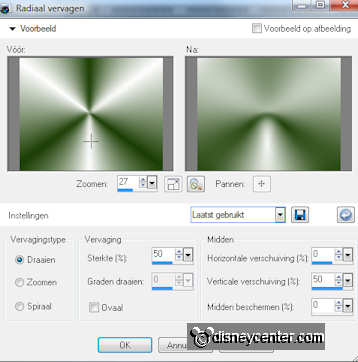
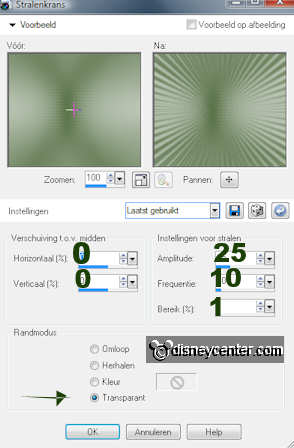
Adjust - Blur - radial blur - with this setting.
2.
Duplicate this layer - image - flip.
Set the opacity of this layer at 50.
Layers - merge - move down.
3.
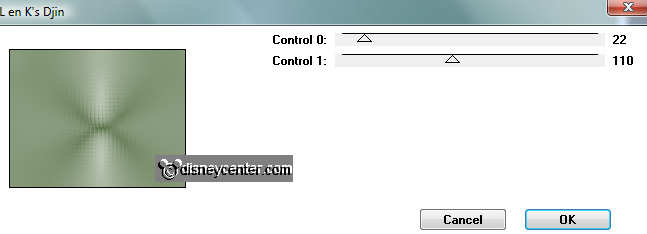
Effects - L en K Landsiteofwonders - L en K's Dijn - with this
setting.
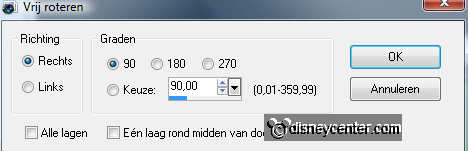
Duplicate this layer - Image - free rotate - with this setting.
Set the opacity of this layer at 50.
4.
Effects - Distortion Effects - Spiky Halo- with this setting.
Effects - Edge Effects - enhance more.
Layers - merge - move down.
5.
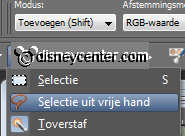
Go to selection tool - selection - ellipse.
And pull an ellipse from about 400x300 in the middle.
New raster layer - sill this with the foreground color.
6.
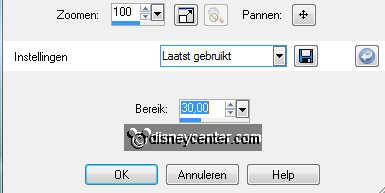
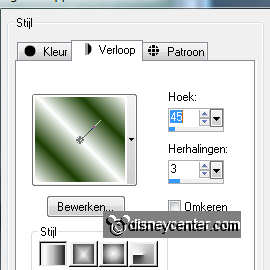
Selections - modify - contract 4 - new raster layer.
Fill this with gradient linear - with this setting.
Adjust - Blur - Gaussian Blur - with this setting.
Selections - select none.
7.
Effects - L en K Landsiteofwonders - L en K's Elvida - with this
setting.
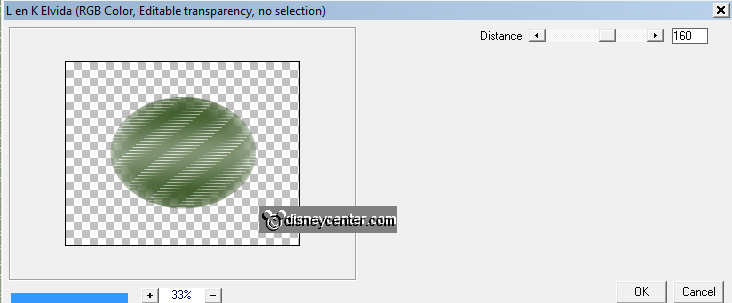
Duplicate this layer - image - mirror.
Move this a little bit to the left, so that it fits in the white
border.
Set the opacity of this layer at 50.
Layers - merge - move down. And one more time.
8.
Copy word-art and paste as a new layer on the image.
Place this in the ellipse.
Layers - merge - move down.
Cut this layer and paste as a new image. That we use later.
9.
Image - add border 30 - symmetric - color white.
Select the border with the magic wand- with this setting.

Fill this with the gradient linear - with this setting.
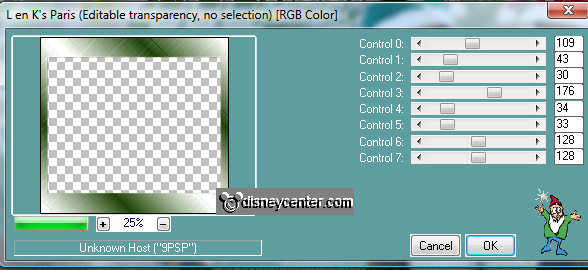
10.
Effects - L en K Landsiteofwonders - L en K's Paris - with this
setting.
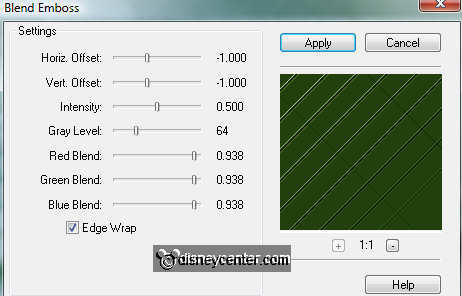
Effects - FM Tile Tools - Blend Emboss - with this setting.
Selections - select all - contract 30.
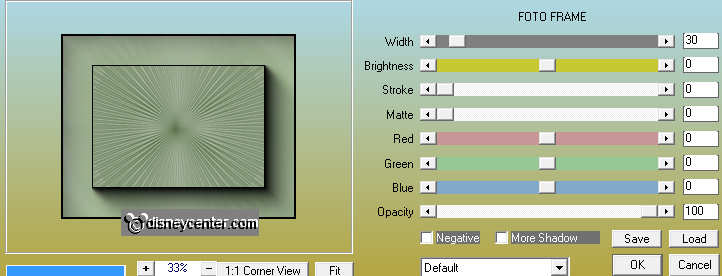
11.
Effects - AAA Frames - Foto frames - with this setting.
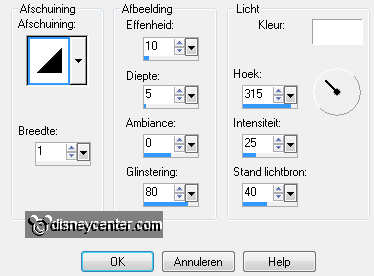
Selections - invert.
Effects - 3D Effects - Inner Bevel - with this setting.
Selections - select none.
Layers - merge - move down.
12.
Copy reindeer2 and paste as a new layer on the image.
Place this left at the bottom of the border. see example.
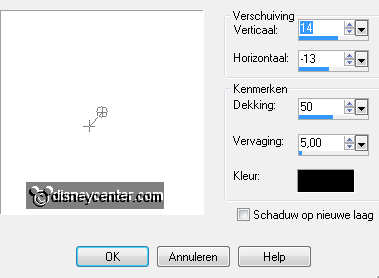
Effects - 3D Effects - drop shadow - with this setting.
13.
Copy knbbkerst and paste as a new layer on the image.
Place this right at the bottom.
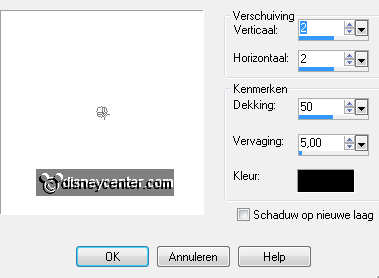
Effects - 3D Effects - drop shadow - with this setting.
14.
Copy the ellipse with word-art and paste as a new layer on the
image.
Place this left at the top. In the inner rectangle.
Image - resize 85% - all layers not checked.
Layers - arrange - move down 2 times.
15.
Selections - select all - selections - Float - selections -
defloat.
Duplicate this layer and lock the top layer.
Stay at the layer below.
Effects - Xero - sparkle - with this setting.
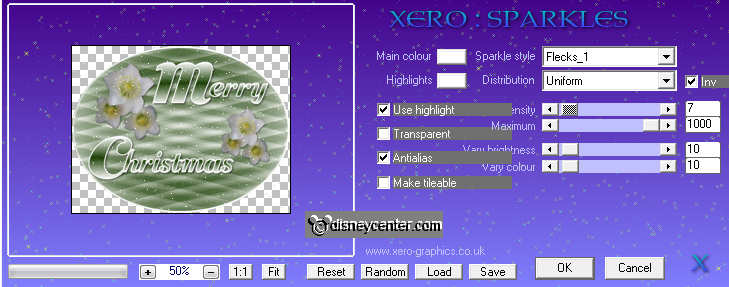
Lock this layer and open the top layer - make this active
Repeat sparkle - now with intensity7 at Intensity 11.
Selections - select none.
16.
Copy kerstroos and paste as a new layer on the image.
Place this in the left upper corner.
Image - resize 50% - all layers not checked.
Give the same drop shadow as in point 13.
17.
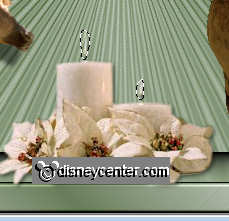
Copy kaars and paste as a new layer on the image.
Place this in the middle at the bottom.
Image - resize 85% - all layers not checked.
18.
Go to Free hand selection - free hand.
And make a selection round the 2 flames - see below.
Duplicate this layer and lock the top layer.
19.
Stay at the layer below.
Effects - Alien Skin Eye Candy 5 Nature - Fire.
Set by setting at small Candle - Basic with this setting.

Lock this layer and open the top layer, make this active.
Repeat the Fire, only now click at random seed.
Selections - select none.
20.
New raster layer - put your watermark into the image.
Lock the copy of raster 2 and copy of raster 5.
Stay at the bottom layer.
Edit - copy merged.
21.
Open animation shop - paste as a new animation.
Back in PSP - lock raster 3 and raster 5 and open copy of raster 3
and copy of raster 5.
Edit - copy merged.
22.
Back in AS - paste after active frame.
Animation - resize format of animation 85% - maintain aspect ratio
of checked.
File - save as - give name - click 3 times at next and than at
finish.