|

This
Tutorial is copyrighted to the Tutorial Writer, © Emmy Kruyswijk.
This Tutorial may not be forwarded, shared or otherwise placed on any Web Site
or group without written
permission from
Emmy Kruyswijk.
Many of the material are made by me.
Please respect my work and don't change the file names.
At all Disney creations must be copyrighted.
Do you want to link my lessons?
Please send
me a mail.
Needing:
1 tube, 3 selections and 1 preset Alien Skin
made by me.
1 image find on the
internet.
1 font
Plug-ins:
I.C.NET Software - Filters Unlimited 2.0 - Paper Textures - Filter Papers
I.C.NET Software - Filters Unlimited 2.0 - &BkgDesigners sf10
III> - VMT Instant Tile
Tramages - Panel Stripes
Xenoflex 2.0 - Constellation
FM Tile Tools - Blend Emboss
L&K Land of wonders - L&K's Zitah
Tramages - Gradient/Spokes Ratio Maker
Alien Skin Eye Candy 5 Impact - Glass
download here
Before you begins.......
Open the tubes in PSP.
Set the plug-ins in the folder plug-ins
and set the selections in the folder selections.
Double click the preset Alien Skin (Emmysculptures, he imports itself in the
plug-in.
Minimize the font or install this.
Material

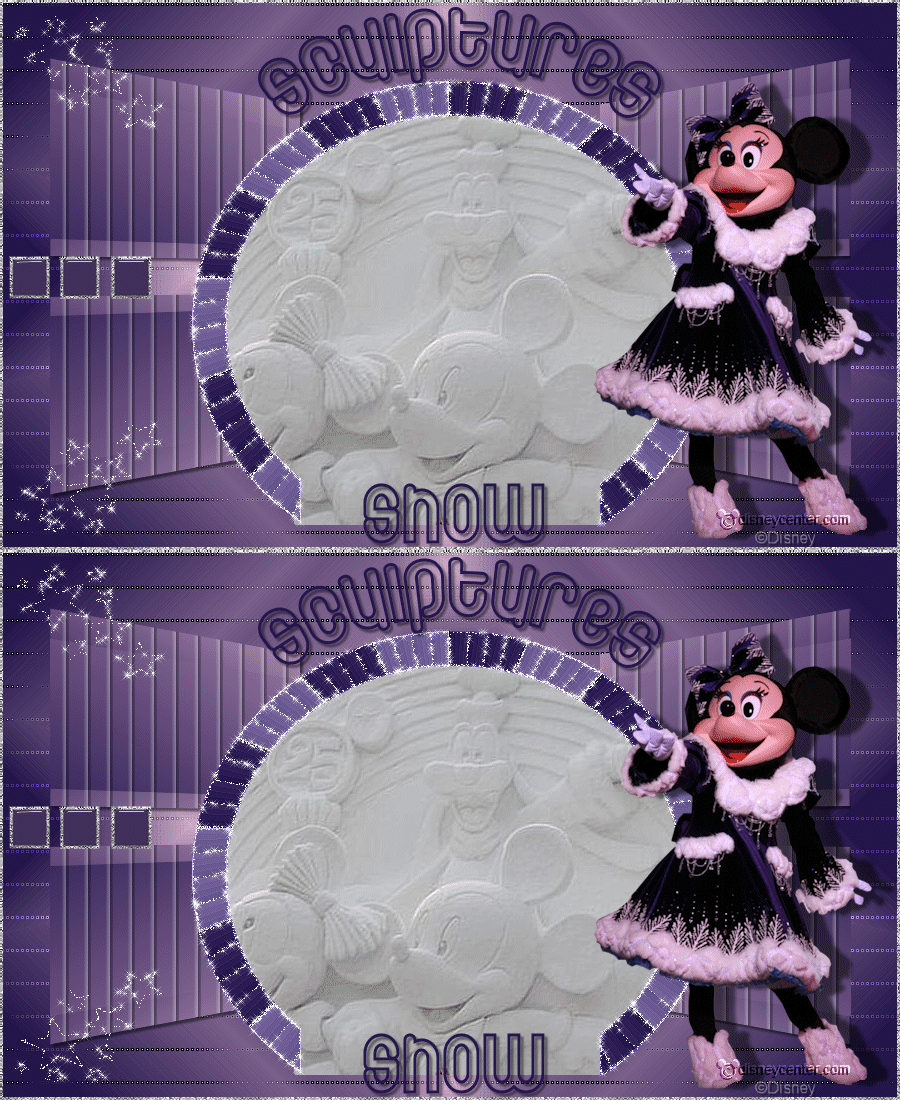
Snow Sculptures
1.
File - open new transparent image
800x500.
Set in the material palette the foreground color at
#26174e
and the background color at
#d3aecf.
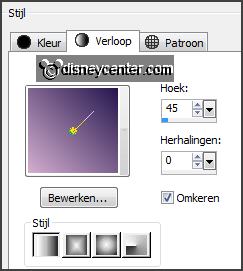
Make from the foreground a gradient linear - with this setting.
2 .
Activate flood fill tool - fill the layer with the gradient.
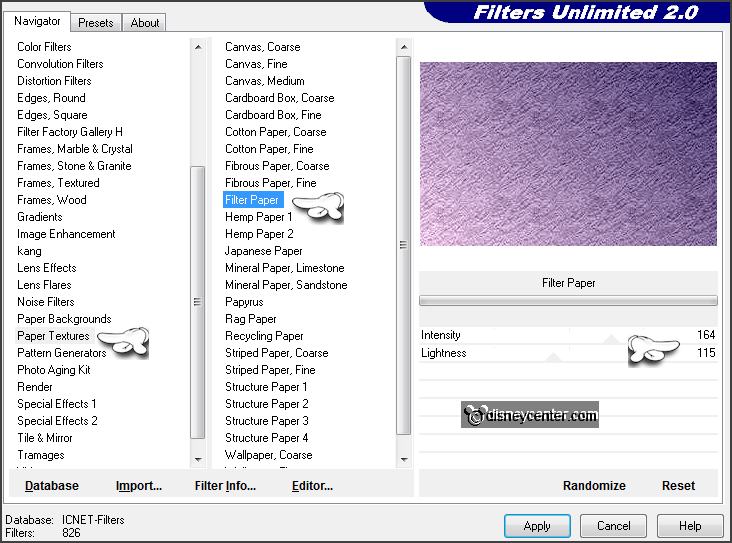
Effects - plug-ins - I.C.NET Software - Filters Unlimited 2.0 - Paper
Textures - Filter Papers -
with this setting - click Apply.
Selections - select all.
Selections - modify - contract 85 pixels.
3.
Layers - new raster layer.
Fill the selection with the gradient.
Selections - select none.
Effects -
plug-ins - I.C.NET Software -
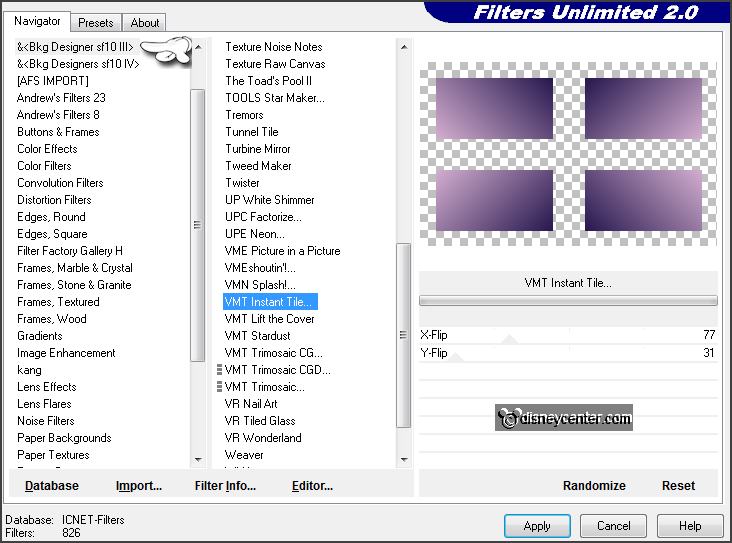
Filters Unlimited 2.0 - &BkgDesigners sf10 III> - VMT Instant Tile -
with this setting -
click Apply.
4.
Layers - duplicate.
Repeat the plug-in VMT Instant Tile - click Apply.
Layers - arrange - move down.
5.
Effects - Geometrics Effects - Perspective Horizontal -
with this setting.
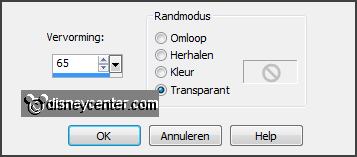
Objects - Align - left.
Lock the top layer.
6.
Activate selection tool - rectangle - and make a selection as below.
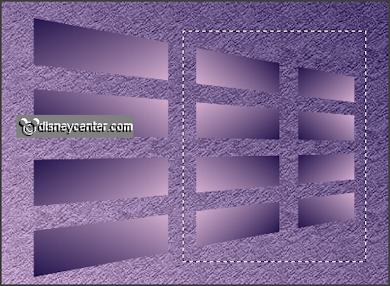
Click at the delete key.
Selections - select none.
7.
Open the top layer and activate this.
Effects -
Geometrics Effects - Perspective Horizontal -
setting is right.
Objects - Align - left.
8.
Activate selection tool - rectangle - and make a selection as below.
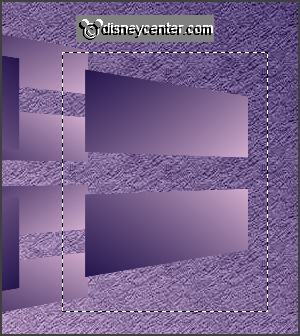
Click at the delete key.
Selections - select none.
9.
Activate the top layer.
Layers - merge - merge down.
Layers - duplicate.
Image - mirror.
Layers -
merge - merge down.
10.
Activate selection tool - custom selection -
with this setting.
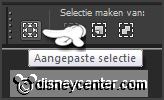
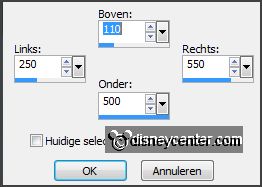
click at th e delete
key.
Selections - select none.
Effects -
plug-ins
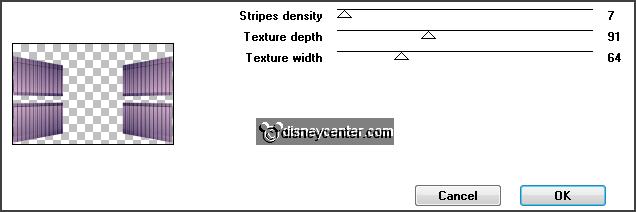
- Tramages - Panel Stripes -
with this setting
-
click OK.
Effects - 3D Effects - drop shadow -
with this setting.

11.
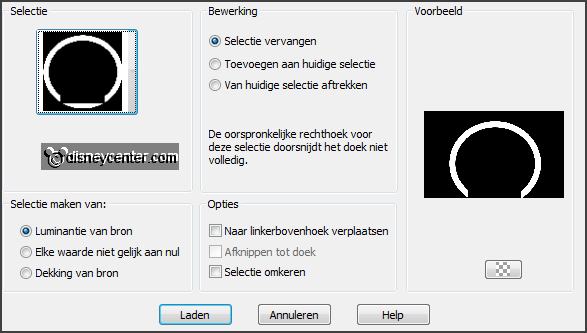
Selections - load/save selection - load selection from disk - look
Emmysculptures1 -
with this setting.
Layers - new raster layer.
Set in the material palette the foreground back to color.
Fill the selection with the foreground color.
Selections - select none.
12.
Effects - plug-ins - Tramages - Gradient/Spokes Ratio Maker -
with this setting -
click OK.

Effects - Edge effects - enhance.
Layers - duplicate.
13.
Activate raster2.
Effects -
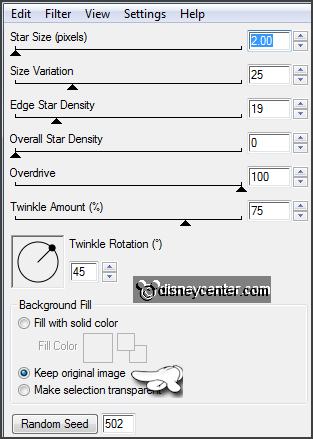
plug-ins - Xenoflex 2.0 -
Constellation -
with this setting -
click OK.
Activate copy of raster2.
Repeat Xenoflex 2.0 - Constellation - click at Random Seed - click OK.
Lock this layer.
14.
Lock the 2 bottom layers.
Activate the magic wand - with setting below - and select in the middle.

Selections - modify - expand 7 pixels.
15.
Activate the image sneeuw-sculpture - edit copy.
Edit - paste as a new layer on the image.
Activate move tool - move the image so that you like it.
Selections - invert - click at delete key.
Selections - select none.
16.
Layers - arrange - move down and 1 more time.
Effects -
plug-ins - FM Tile Tools - Blend Emboss -
default setting.
Open the 2 bottom layers.
17.
Activate the bottom layer.
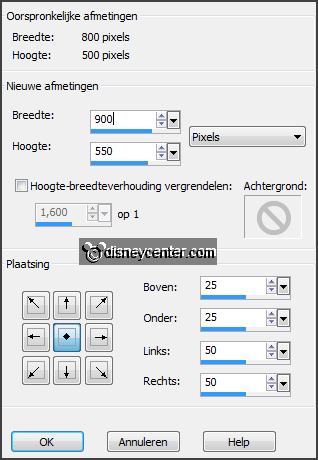
Image - canvas size -
with this setting.
Layers - new raster layer.
Set in the material palette the foreground at gradient rectangle -
with this setting.
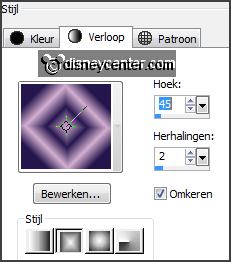
Fill the layer with the gradient .
18.
Layers - duplicate.
Image - mirror.
Set in the layer palette the opacity to 50.
Layers -
merge - merge down.
19.
Layers -
arrange - move down.
Effects -
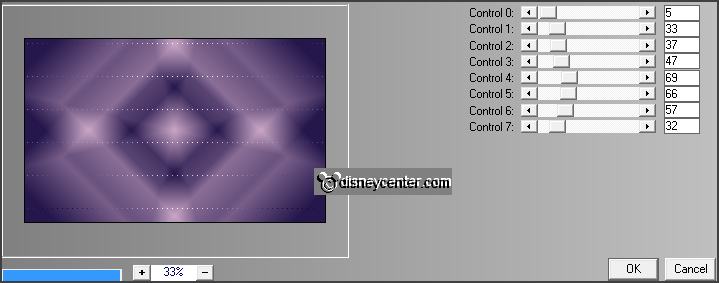
plug-ins - L&K Land of wonders -
L&K's Zitah -
with this setting -
click OK.
Effects - Edge effects - enhance more.
Delete raster 1.
20.
Activate the top layer.
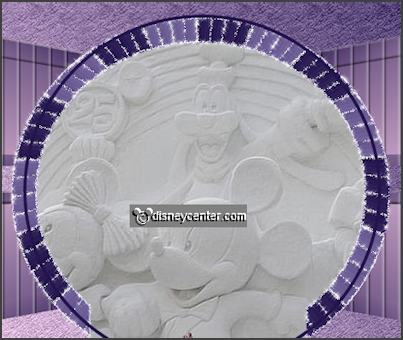
Activate preset shape tool - oval - set the foreground back to color -
lock the background.
Make a oval - round the Xenoflex layer - as below.
Layers - new raster layer.
Activate text tool -
with this setting.

21.
Stay exactly with the mouse at 450px and wait till you see the +sign
with the quarter round T - write - Sculptures - convert to raster layer.
Delete vector 1 and raster 1(blanc).
Effects - 3D Effects - drop shadow -
setting is right.
Move this a little up.
22.
Write - Snow - convert to raster layer.
Place this at the bottom - see example.
Effects - 3D Effects - drop shadow -
setting is right.
23.
Selections -
load/save selection - load selection from disk - look
Emmysculptures -
with this setting.
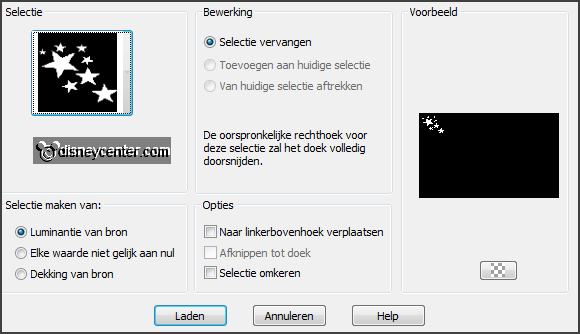
Layers - new raster layer.
Fill the selection with the foreground color.
Selections - select none.
24.
Layers - duplicate.
Image - flip.
Layers - merge - merge down.
Selections - select all.
Selections - float - selections - defloat.
Layers - duplicate.
25.
Activate raster6.
Effects -
plug-ins - Xenoflex 2.0 -
Constellation -
with this setting -
click OK - ( the
Random Seed could be different).
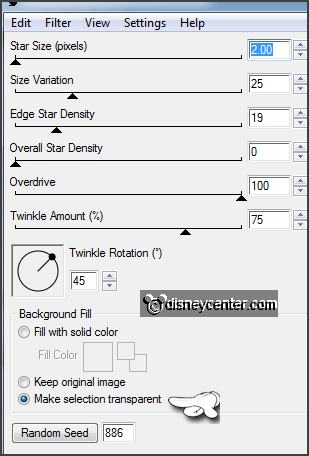
Activate copy of raster6.
Repeat the Constellation - click at Random Seed - click OK.
Selections - select none.
Lock this layer.
26.
Selections -
load/save selection - load selection from disk - look
Emmysculptures2 -
with this setting.
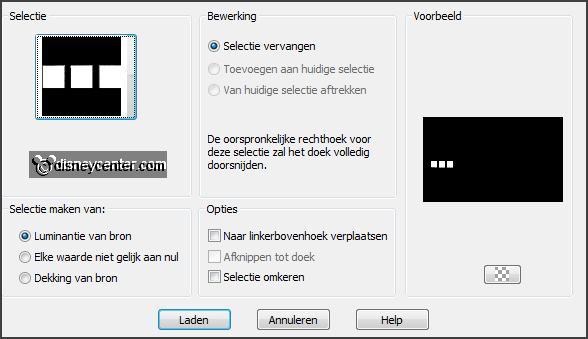
Layers - new raster layer.
Set in the material palette the background at silver pattern.
Fill the selection with the silver pattern.
Selections -
modify - contract
3 pixels.
27.
Layers - new raster layer.
Fill the layer with the foreground color.
Effects -
plug-ins - Alien Skin Eye Candy 5 Impact - Glass -
click on Setting - User
Settings - click on Emmysculptures - click OK.
Selections - select none.
Layers -
merge - merge down.
28.
Activate the tube minniekerst14 - edit - copy.
Edit - paste as a new layer on the image.
Place this to the right side.
Effects - 3D Effects - drop shadow
-
with this setting.
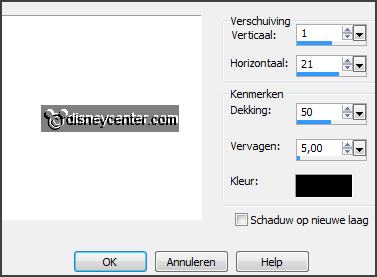
29.
Layers - new raster layer - put your watermark into the image.
Layers - new raster layer.
Fill the with the silver pattern.
Selections - select all.
Selections - modify - contract 3 pixels - click at the delete key.
Selections - select none.
30 .
Activate the bottom layer.
Edit - copy merged.
Open Animation Shop - paste as a new animation.
31.
Back in PSP.
Lock raster 2 and 6 and open copy of raster 2 and 6.
Edit - copy merged
In AS - paste after active frame.
32.
File - save as - give name - click 3 times at next
and than at finish.
Ready is the tag
I hope you like this tutorial.
greetings Emmy
Tested by Nelly

tutorial written
03-11-2013 |