|

This
Tutorial is copyrighted to the Tutorial Writer, © Emmy Kruyswijk 03-02-2012.
This Tutorial
may
not be forwarded, shared or otherwise placed on any Web Site or group without written
permission from
Emmy Kruyswijk
At all Disney creations must be copyrighted.
Do you want to link my lessons?
Please send
me a mail.
Needing
1 image 500x500
1 tube 375x425, 1 selection 1 preset, 1 shape and 1 word-art made by me
1 masker van Moonbeams en Spiderwebs – Mask17
download here.
1 texture.
Filters: Toadies, Xero , Alien Skin Eye Candy Impact en Screenworks
download here.
Materials

Before you begins……
Open your image, tube and mask in PSP,
Double click at the preset of Alien Skin Emmyspring, he imports itself in the user setting
of the plug-in.
Put the selection in the folder selections.
put the texture in the folder texture.
Put the filters in the folder plug-ins.
Spring is in the Air
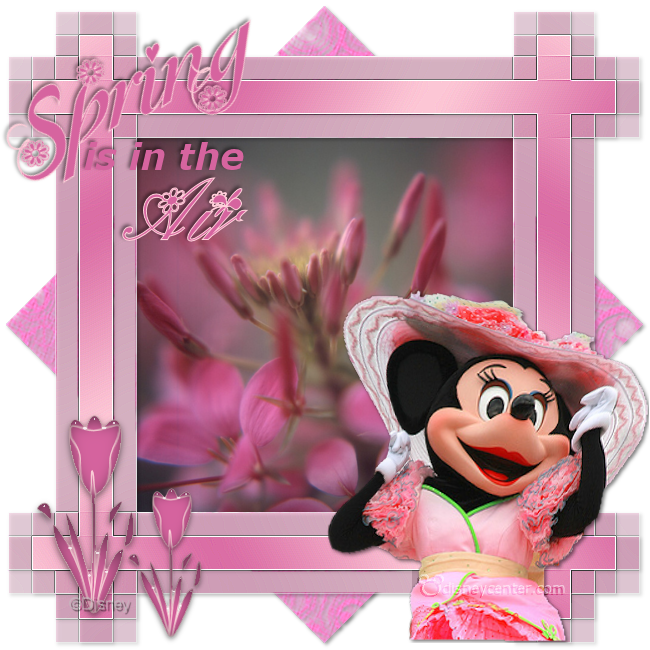
1.Set in the material palette the foreground on a light color from the image or
tube and set the background on a dark color from the image or tube.
2. File – new – open a new transparent image 500x500.
3. Activate Flood Fill Tool – fill the image with the foreground color.
4. Layers – new raster layer.
5. Fill with the Flood Fill this layer with the background color.
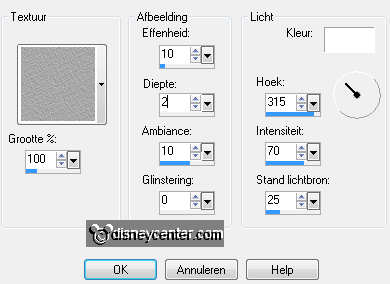
6. Effects – Texture effects – texture – D_Hessian65bw – with this setting.
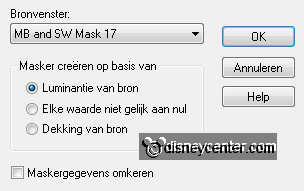
7. Layers – new mask layer – from image – with this setting.
8. Layers – merge – merge group.
9. Effects – Image effects – Seamless Tiling – default setting.
10. Image – Canvas size – with this setting.
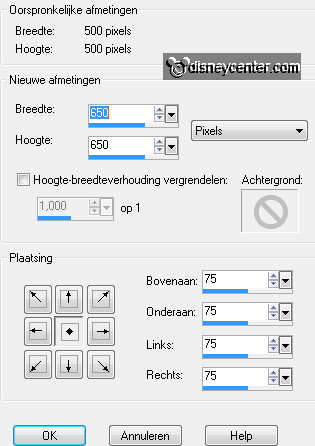
11. Activate the bottom layer – fill this layer with the foreground color.
12. Activate the top layer – image – free rotate – with this setting.

13. Image – resize 90% - all layers not checked.
14. Effects – 3D Effects – drop shadow – with this setting.
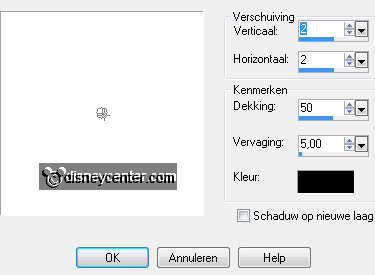
15. Effects – plug-ins – Screenworks – Aged Mosaic.
16. Selections – Load/save selection – load selection from diskf – look
Emmyspring – with this setting.
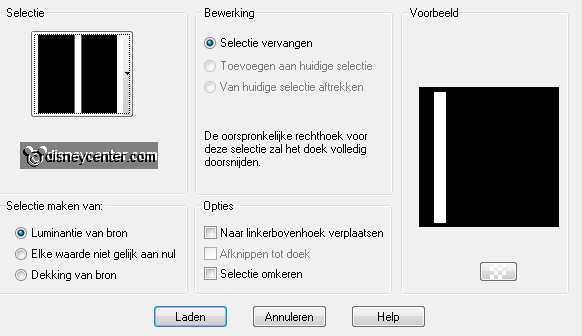
17. Layers – new raster layer.
18. Make in the material palette from the foreground a gradient linear – with
this setting.
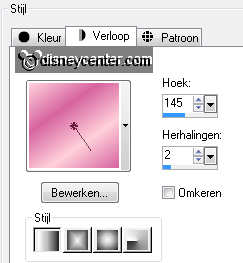
19. Activate Flood Fill Tool – fill the selection with the gradient.
20. Adjust – blur – Gaussian blur – radius on 20.
21. Selections – select none.
22. Layers – duplicate.
23. Image – mirror.
24. Layers – duplicate.
25. Image – free rotate - with this setting.

26. Effects – Image effects – Offset – with this setting.
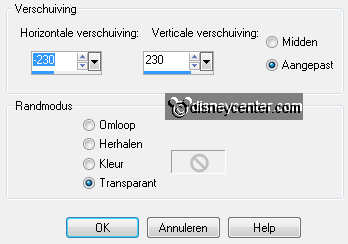
27. Layers – duplicate.
28. Image – Flip.
29. Layers - merge – merge down 3 times.
30. Effects – plug-ins – Toadies – What You Are? – with this setting.

31. Effects – Edge effects – enhance more.
32. Activate the magic wand – with this setting.

33. Click in the middle of the frame of raster 2.
34. Layers – new raster layer.
35. Activate the image – edit – copy.
36. Edit – paste into selection.
37. Selections – select none.
38. Activate raster 2.
39. Effects – 3D Effects – drop shadow – settings are right.
40. Activate group raster 2.
41. Activate selection tool – selection – rectangle – and make a selection as
below.
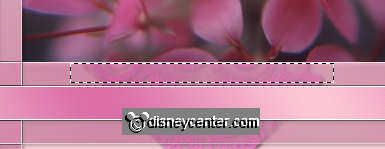
42. Click on the delete key of your keyboard.
43. Repeat this also by the other pieces where the mask came through – see below.
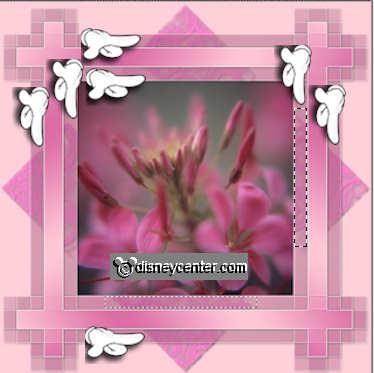
44. Selections – select none.
45. For the sides you make a new selection – see image point
43.
46. Selections – select none.
47. Activate the top layer.
48. Activate the tube – edit – copy.
49. Edit – paste as a new layer on the image.
50. Activate Move tool – put the tube right at the bottom.
51. Activate Warp Brush – Mesh warp - see below
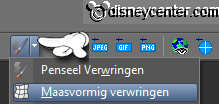

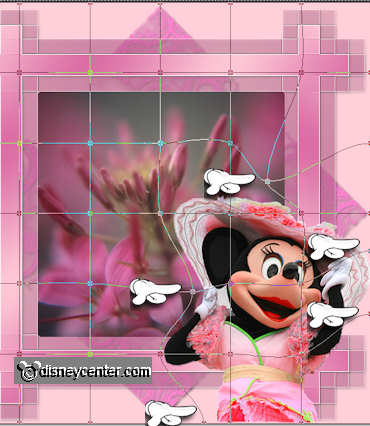
52. Now draw a number of squares to the tube (what you like – it must distort a
bit itself).
53. Activate move tool so the mesh formation goes away.
54. Effects – plug-ins – Xero – Porcelain - with this setting.
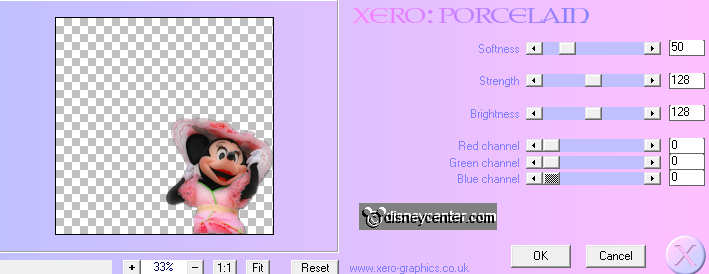
55. Effects – 3D Effects – drop shadow – settings are right.
56. Activate the word-art – edit - copy.
57. Edit – paste as a new layer on the image.
58. Put this with the move tool at a nice place on the image.
59. Activate Preset Shape Tool – preset shape – look tulpEmmy – with this
setting.

60.Set in the material palette the foreground back to color.
61. Draw a preset shape about 100x200 – see below.
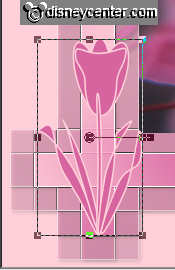
62. Layers – convert to raster layer.
63. Effects – plug-ins – Alien Skin - Impact – Glass – click by Settings
– User settings -at Emmy spring.
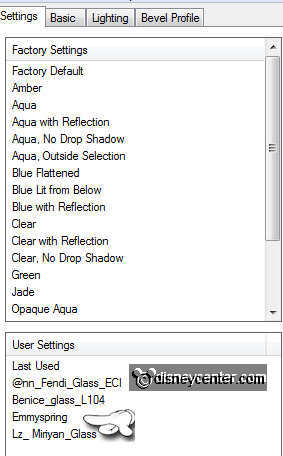
64. Layers – duplicate.
65. Image – resize 75% - all layers not checked.
66. Put this with the move tool near the other tulip - see example.
67. Layers - new raster layer – put your watermark into the image.
68. Activate the bottom layer – Layers – remove.
69. Layers – merge – merge all.
70. File – export – PNG optimizer.
Ready is the tag
I hope you like this tutorial.
greetings Emmy
Tested
by Cobie

Tutorial written 23-03-2012
|