Open your tubes, wordart and image in PSP.
Sunset Silence
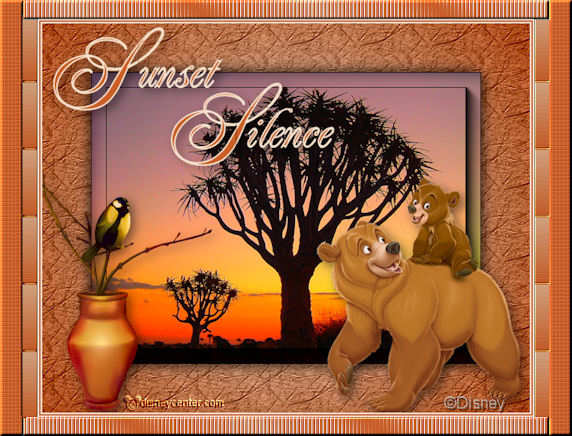
Foreground color #f5e2cd and background color #b8541b
1.
Open the image 0d7ba
Duplicate this - Shift+D - close the original.
2.
Effects - AAA Frames - Foto Frames - with this setting.
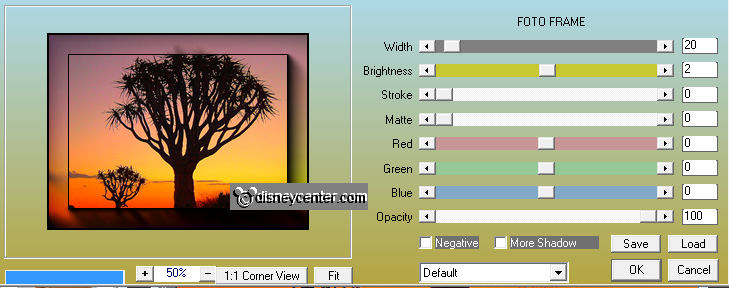
Layers - promote background layer.
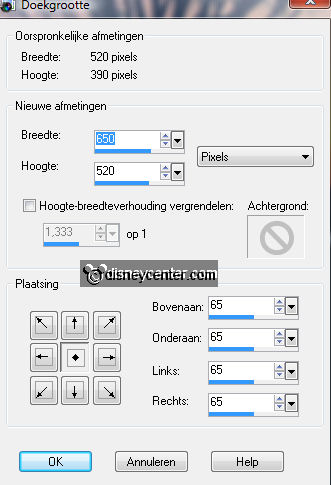
Image - Canvas size 650x450 - with this setting - click in the middle.
3.
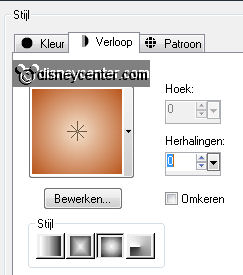
New raster layer - fill this with the gradient sunburst.
Effects - Filter Unlimited 2.0 - Paper Texture - Japanese Paper - with this
setting.
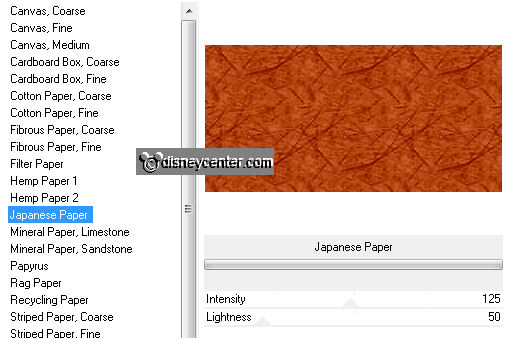
Effects - FM Tile Tools - Blend Emboss - default setting.
Layers - arrange - move down.
4.
Stay at the top layer.
Effects - 3D Effects - drop shadow with this setting.
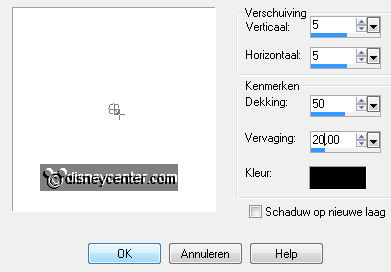
Repeat the drop shadow with -5.
5.
Copy @nn_080406_Spring_BritaSeifert and paste as a new layer.
Image - mirror - image - resize 75% - all layers not checked.
Give the same drop shadow as in point 4.
Place this left at the bottom.
6.
Copy Disney bears and paste as a new layer.
Image - resize 65% - all layers not checked.
Give the same drop shadow as in point 4.
Place this right at the bottom.
7.
Copy wordart Sunset Silence and paste as a new layer.
Place this left at the top.
8.
Image - add border 2 - foreground color.
Image - add border 2 - background color.
Image - add border 2 - foreground color.
9.
Image - add border - symmetric not checked - 20 left and right
- bottom and top 0 - color white.
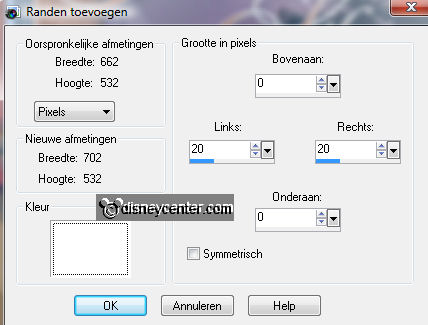
Select the white borders - fill this with the background color.
Effects - texture effects - blinds with this setting.
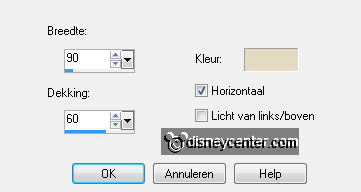
Effects - Edge Effects - more enhance.
Effects - FM Tile Tools - Blend Emboss - default setting.
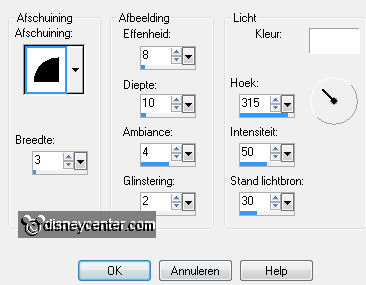
Effects - 3D Effects - Inner Bevel - with this setting.
10.
Image - add border - symmetric not checked - 25 top and bottom - left and
right 0 -
color white.
Select the white borders - fill this with the gradient linear - with this
setting.
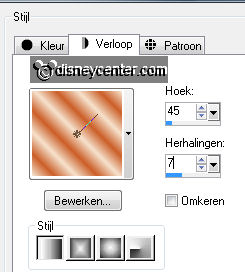
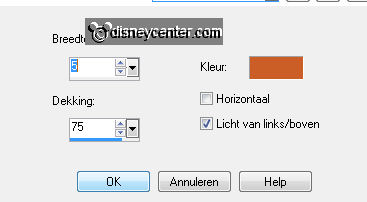
Effects - texture effects - blinds - with this setting.
Effects - Edge Effects - enhance.
Effects - FM Tile Tools - Blend Emboss - default setting.
11.
Image - add border - symmetric not checked - 30 left and right
- bottom and top 0 - color white.
Select the white borders - fill this with the background color.
Effects - Xero - Fritillary - with default setting.
Effects - FM Tile Tools - Blend Emboss - default setting.
Give the same Inner Bevel as in point 9.
12.
New raster layer - put your watermark into the image.
Image - resize 75% - all layers checked.
File - export - JPEG optimizer.
Ready is the tag
I hope you like this tutorial.
greetings Emmy

Tutorial written
28-07-2011