1.
File - open new transparent image 700x700.
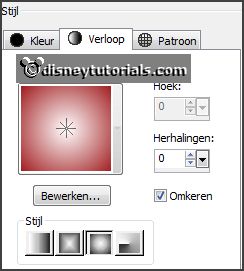
Set in the material palette the foreground color on #a11d20 and the background
color on white.
Make from the foreground a gradient sunburst - with this setting.
2.
Activate the tube Emmyraster -
edit - copy.
Edit - paste as a new layer on the image.
Activate move tool - place it to the top and to the right.
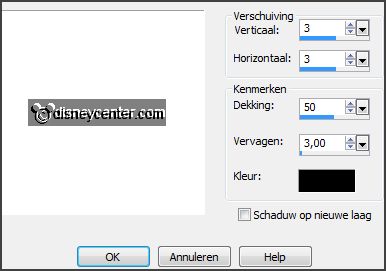
Effects - 3D Effects - drop shadow - with this setting.
3.
Activate the tube EileensDesign_CUVol22-9 -
edit - copy.
Edit - paste as a new layer on the image.
Place it a little down.
Activate the eraser - and erase the part away, what comes under the frame.
Effects - 3D Effects - drop shadow - setting is right.
4.
Activate the magic wand - with setting below - and select in the middle of the frame.

Selections - modify - expand 10 pixels.
Layers - new raster layer.
Fill the selection with the gradient.
Layers - arrange - down.
Effects - Texture effects - Blinds - with this setting.

Selections - select none.
Activate the top layer.
Layers - merge - merge down.
5.
Activate the tube EileensDesign_CUVol20-8 -
edit - copy.
Edit - paste as a new layer on the image.
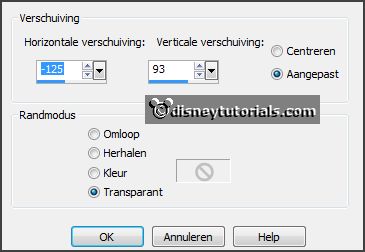
Effects - Image effects - offset - with this setting.
Effects - 3D Effects - drop shadow - setting is right.
6.
Select with the magic wand in the middle of the frame.
Selections - modify - expand 10 pixels.
Layers - new raster layer.
Fill the selection with the gradient.
Layers - arrange - down.
7.
Activate the tube word-artE-Carnaval2015 -
edit - copy.
Edit - paste as a new layer on the image.
Place it - as below.

Layers - merge - merge down.
Layers - duplicate and 1 more time.
Zet de bovenste kopie lagen op slot.
8.
Activate raster 2.
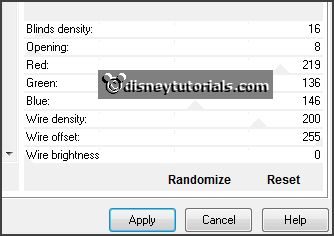
Effects - plug-ins - I.C.NET Sofware Filters Unlimited 2.0 - &<Sandflower
Special*v*> - Design Blind - with this setting - klik Apply.
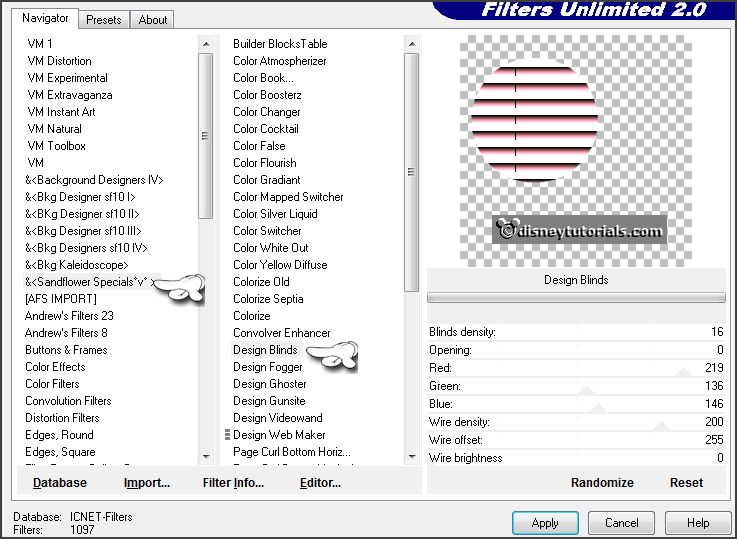
If you use a different color, you have to play with red, green and blue.
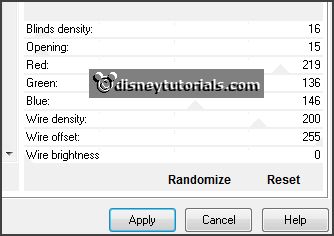
Lock raster2 and open the copy of raster2.
Repeat Sandflower - with this setting.
Lock copy of raster2 and open the copy(2) of
raster2.
Repeat Sandflower - with this setting.
Lock the copy layers and open raster 2.
9.
Activate the top layer.
Activate the tube mincarnaval4 -
edit - copy.
Edit - paste as a new layer on the image.
Place this right at the bottom in the frame.
Effects - 3D Effects - drop shadow - setting is right.
10.
Activate the tube EileensDesign_CUVol20-9 -
edit - copy.
Edit - paste as a new layer on the image.
Place it in the middle at the bottom.
Effects - 3D Effects - drop shadow - setting is right.
11.
Activate the tube pin -
edit - copy.
Edit - paste as a new layer on the image.
Place this right at the top in the frame - see example.
Effects - 3D Effects - drop shadow - setting is right.
12.
Activate the tube EileensDesign_CUVol22-6 -
edit - copy.
Edit - paste as a new layer on the image.
Place this right at the top in the frame - see example
Effects - 3D Effects - drop shadow - setting is right.
13.
Activate the tube Emmymask5 -
edit - copy.
Edit - paste as a new layer on the image.
Image - free rotate - with this setting.
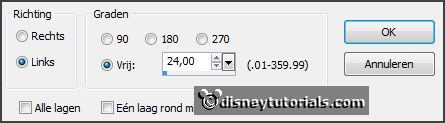
Place it left - see example.
Effects - 3D Effects - drop shadow - setting is right.
14.
Layers - new raster layer - put your watermark into the image.
Layers - new raster layer.
Fill this with the background color.
Layers - arrange - send to bottom.
15.
Edit - copy merged.
Open Animatie Shop - paste as a new animation.
16.
Back in PSP.
Lock raster 2 and open copy of raster 2.
Edit - copy merged.
In AS - paste after active frame.
17.
Back in PSP.
Lock copy of raster 2 and open copy(2) of raster 2.
Edit - copy merged.
In AS - paste after active frame, be sure the
last frame is selected.
Animation - Frame Properties - set the first frame to 100 - the second
frame to 50 and the third frame to 200.
File - save as - give name - click 3 times at next and than at finish.
18.
Animation - Frame properties - set this to 25.
File - save as - give name - click 3 times at next and than at finish.
Ready is the tag
I hope you like this tutorial.
greetings Emmy
Thank you Nelly for testing.

