1.
File - open new transparent image 700x700.
Set in the material palette the foreground
color at wit
Set in the material palette the foreground
color at #808080.
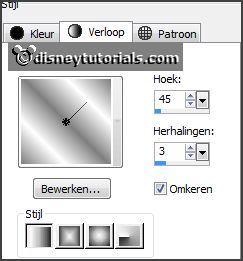
Make from the foreground a gradient linear -
with this setting.
2.
Activate the tube element43 -
edit - copy.
Edit - paste as a new layer on the image.
Image - free rotate - with this setting.

3.
Activate the magic wand - click in the frame border.
Selections - modify - expand 5 pixels.
Layers - new raster layer.
Activate flood fill tool - fill the selection with the gradient.
Layers - arrange - down.
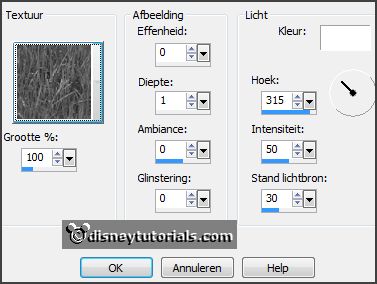
Effects - Texture effects - gras - with this setting.
Selections - select none.
4.
Activate the top layer.
Layers - merge - merge down.
Select with the magic wand in the middle of the frame.
Selections - modify - expand 7 pixels.
Layers - new raster layer.
Fill the selection with the background color.
Layers - arrange - down.
Selections - select none
5.
Activate the tube mickeykerst13 -
edit - copy.
Edit - paste as a new layer on the image.
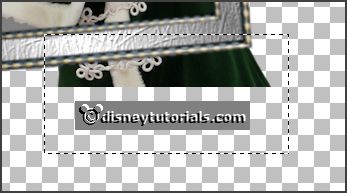
Activate selection tool - rectangle - and make a selection - as below - click at
the delete key.
Selections - select none.
6.
Layers - duplicate.
Layers - arrange - up.
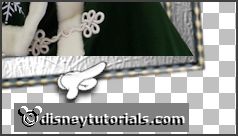
Activate the eraser and erase the part on the frame - see below.
Effects - 3D Effects - drop shadow - with this setting.
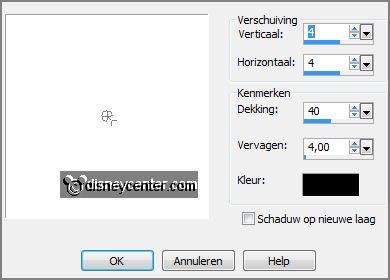
Activate raster 2 - give the same drop shadow.
7.
Activate the top layer.
Activate the tube GoldenSun_HO!HO!HO!_element5 -
edit - copy.
Edit - paste as a new layer on the image.
Image - flip
Place this right at the top - see example.
Effects - 3D Effects - drop shadow - setting is right.
8.
Activate the tube GoldenSun_HO!HO!HO!_element38 -
edit - copy.
Edit - paste as a new layer on the image.
Place it on the Christmas branch -
see example.
Effects - 3D Effects - drop shadow - setting is right.
Layers - merge - merge down.
Layers - arrange - send to bottom.
9.
Layers - duplicate.
Image - mirror.
Place it as in the example.
Activate the top layers.
10.
Activate the tube GoldenSun_HO!HO!HO!_element37 -
edit - copy.
Edit - paste as a new layer on the image.
Place it right at the bottom.
Effects - 3D Effects - drop shadow - setting is right.
Layers - duplicate.
Image - mirror.
11.
Activate the tube GoldenSun_HO!HO!HO!_element5 -
edit - copy.
Edit - paste as a new layer on the image.
Place it in the middle at the bottom.
Effects - 3D Effects - drop shadow - setting is right.
12.
Activate the tube GoldenSun_HO!HO!HO!_element34 -
edit - copy.
Edit - paste as a new layer on the image.
Place it right at the bottom -
see example.
Effects - 3D Effects - drop shadow - setting is right.
Layers - duplicate.
Place it in the middle at the bottom -
see example.
13.
Activate the tube GoldenSun_HO!HO!HO!_element18 -
edit - copy.
Edit - paste as a new layer on the image.
Image -resize 2 times 75% - all layers not checked.
Place it right at the bottom -
see example.
Effects - 3D Effects - drop shadow - setting is right.
Layers - duplicate.
Place it slightly to the left -
see example.
14.
Activate the tube Happy_Days by Anna-Jolante el (79) -
edit - copy.
Edit - paste as a new layer on the image.
Place it near the pine cone - see example.
Effects - 3D Effects - drop shadow - setting is right.
15.
Activate the tube GoldenSun_HO!HO!HO!_element88 -
edit - copy.
Edit - paste as a new layer on the image.
Place it on the leaves - see example.
Effects - 3D Effects - drop shadow - setting is right.
16.
Activate the tube GoldenSun_HO!HO!HO!_element71 -
edit - copy.
Edit - paste as a new layer on the image.
Image - mirror.
Image - free rotate - with this setting.

Effects - Image effects - offset - with this setting.
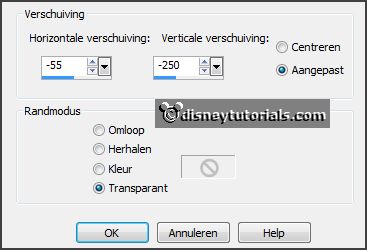
Effects - 3D Effects - drop shadow - setting is right.
Layers - arrange - down - place this under raster 6.
17.
Activate the tube element31 -
edit copy.
Edit - paste as a new layer on the image.
Place this near the pine cone - see example.
Layers - arrange - down.
Effects - 3D Effects - drop shadow - setting is right.
18.
Activate the tube element1 -
edit copy.
Edit - paste as a new layer on the image.
Image - mirror.
Place this near the lantern - see example.
Effects - 3D Effects - drop shadow - setting is right.
19.
Activate the tube GoldenSun_HO!HO!HO!_element6 -
edit - copy.
Edit - paste as a new layer on the image.
Image - free rotate - with this setting.

Place this as in the example.
Layers - arrange - down - place this under raster 5.
Effects - 3D Effects - drop shadow - setting is right.
20.
Layers - new raster layer - put your watermark into the image.
Layers - merge - merge all visible layers.
File - export - PNG Optimizer.