1.
File – open new transparent image 800x600.
Put in the material palette the foreground on #b99a99 and the background on
white.
Make from the foreground a gradient linear – with this setting.
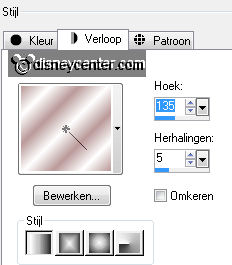
2.
Selections – select none.
Activate the image disneyland – edit - copy.
Edit – paste in selection.
Selections – select none.
3.
Adjust – blur – Gaussian blur – radius on 25.
Adjust – Hue and Saturation – colorize – with this setting.
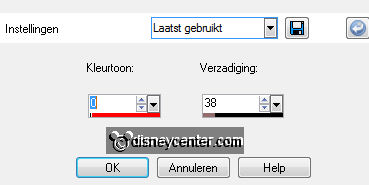
4.
Edit – paste as a new layer on the image. (Stays in memory)
Selections – select all.
Selections – float – selections – defloat.
5.
Selections – modify – select selected borders - with this setting.
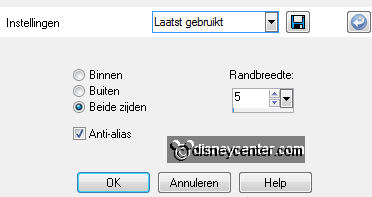
Layers – new raster layer.
Activate flood fill tool - fill the selection with the gradient linear.
6.
Effects – plug-ins – VM Extravaganza – Ray Transmission – with this setting –
click OK.

Effects – plug-ins – FM Tile Tools – Blend Emboss
– with this setting-
click OK.
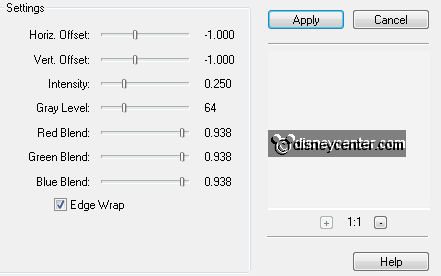
7.
Selections – select none.
Effects – 3D Effects – drop shadow – with this setting.
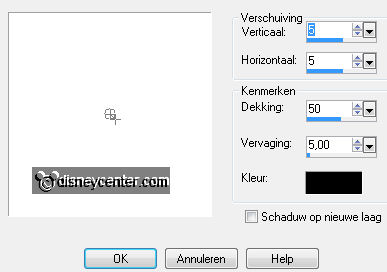
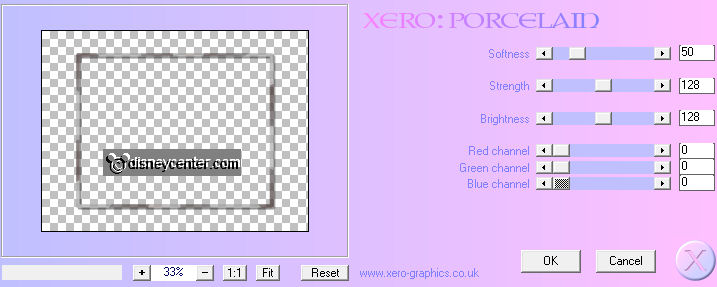
Effects – plug-ins – Xero – Porcelain – with this
setting – click OK.
8.
Activate the tube mickeykerst2 – edit - copy.
Edit - paste as a new layer on the image.
Activate move tool and move the tube left on the image – see example.
9.
Effects – 3D Effects – drop shadow – setting is right.
Effects – plug-ins – Xero – Porcelain – setting is right – click OK.
10.
Activate the tube bladbes – edit - copy.
Edit - paste as a new layer on the image.
Set the tube right at the bottom.
11.
Effects – 3D Effects – drop shadow – setting is right.
Image – free rotate – with this setting.

12.
Activate the word-artWinterMagic – edit - copy.
Edit - paste as a new layer on the image.
Set this on a nice place. I've put it in the middle at the bottom.
13.
Activate the bottom layer.
Effects – plug-ins – VM Distortion – Kaleidoscope– with this setting –
click OK.

Selections – select all.
14.
Selections – modify – contract 25 pixels.
Selections – invert.
Layers – new raster layer.
Fill the selection with the gradient.
15.
Effects – plug-ins – Graphics Plus – Cross Shadow - all to 50 – click
OK.
Effects – plug-ins – Penta.com – Jeans – with this setting – click OK.

Effects – 3D Effects – drop shadow – setting is
right.
Selections – select none.
16.
Layers – new raster layer – put your watermark into the image.
Lock in the layer pallet all layers – except the bottom 3.
Make the bottom layer active.
17.
Edit – copy merged.
Open animation shop – edit – paste as a new animation.
Animation – Insert frames – Empty – with this setting.
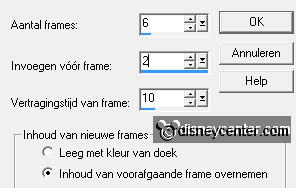
18.
Open the animation Emmysneeuw .
Edit – select all – edit - copy.
Edit – paste in selected frame.
Place the snow on the image.
19.
Go back to PSP.
Lock the bottom 3 layers and open the other layers.
Edit – copy merged.
20.
Back to AS – paste as a new animation.
Animation – Insert frames – Empty – with this setting.

21.
Edit – select all – edit - copy.
Edit – paste in selected frame.
Place this on the snow – make sure that the frame exactly fits.
22.
Open the animation oldlamp.
Edit – select all – edit - copy.
Edit – paste in selected frame.
Place the lamp right at the top of the snow frame – see example.
23.
Animation – resize format of animation - with this setting.
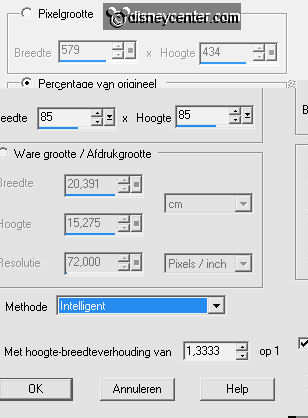
File
– save as– give name – click 3 times at next and than at finish.