|

This
Tutorial is copyrighted to the Tutorial Writer, © Emmy Kruyswijk 07-12-2012.
This Tutorial
may
not be forwarded, shared or otherwise placed on any Web Site or group without written
permission from
Emmy Kruyswijk
Many of the material are made by me.
Please respect my work and don't change the file names.
At all Disney creations must be copyrighted.
Do you want to link my lessons?
Please send
me a mail.
Needing:
1 scrapkit Northern Light van
Vaybs
1 tube, 1 word-art, 1 preset Alien Skin en 1 animation - made
by me.
Plug-ins: Alien Skin Eye Candy
Impact – Gradient Glow, Penta.com – Dot and Cross, - download
here.
Animatie Shop.
Before you begins.......
Open the tubes, paper and word-art in PSP,
Put the plug-ins in the folder plug-ins.
Double click the preset Alien Skin (Emmywinterstars), he imports itself in the
plug-in.
Material

Winter Stars

1.
File - open new transparent image 900x650.
Selections – select all.
Activate - DVB_NothernLightpaper(6) – edit - copy.
Edit – paste in selection.
2.
Selections – select none.
Effects – Edge effects – enhance.
Effects – Media Art Effects – brush strokes – with this setting.
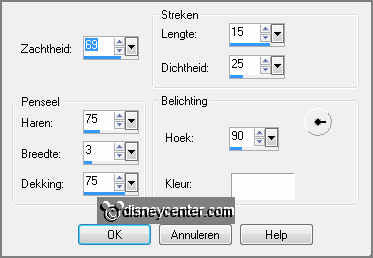
3.
Activate – DVB_NLElement (60) – edit - copy.
Edit - paste as a new layer on the image.
Image – free rotate –
with this setting.

4.
Effects – Image effects – offset –
with this setting.
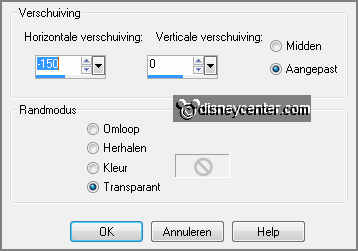
Effects – plug-ins – Alien Skin Eye Candy Impact – Gradient Glow –
click at settings - User Settings – Emmywinterstars – click OK.
Activate the magic wand – with setting below – select all squares –
except the middle square.

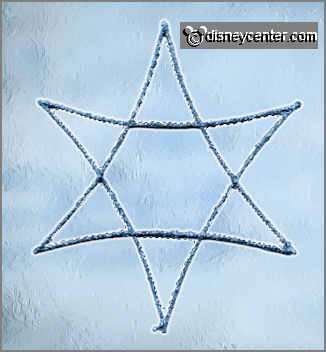
5.
Selections – modify – expand 5 pixels.
Layers – new raster layer.
Activate flood fill tool – fill the selection with the color white.
6.
Layers – arrange – move down.
Selections – select none.
Layers – merge – merge down.
Effects – 3D Effects – drop shadow –
with this setting.
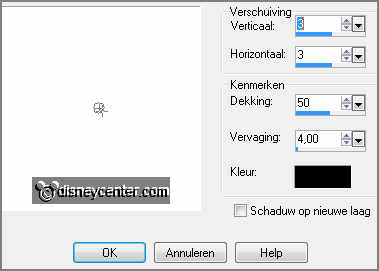
7.
Select with the magic wand in the middle of the star.
Selections – modify - expand 5 pixels.
Layers – new raster layer.
Activate – DVB_NLElement (3) – edit - copy.
8.
Edit - paste in selection.
Selections – select none.
Lock in the layer palette this layer.
9.
Activate – DVB_NLElement (14) – edit - copy.
Edit - paste as a new layer on the image.
Activate move tool – place the tube on the left triangle – see example.
10.
Layers – duplicate – image - mirror – place this on the right side.
Edit – paste (is still in memory) as a new layer on the image.
Place this on the top triangle.
11.
Effects – 3D Effects – drop shadow - setting is right.
Do this with all flowers.
Layers – merge – merge down – 1 more time.
12.
Activate the top layer.
Activate – DVB_NLElement (47) – edit - copy.
Edit - paste as a new layer on the image.
Effects – 3D Effects – drop shadow –setting is right.
Place the bow at the bottom – see example.
13.
Actives – DVB_NLElement (32) – edit - copy.
Edit - paste as a new layer on the image.
Image – free rotate –
with this setting.

14.
Effects – 3D Effects – drop shadow –setting is right.
Layers – arrange – move down – and 2 more times.
Layers – duplicate – image - mirror.
Place this at the other side.
15.
Layers – merge – merge down.
Edit – paste (is still in memory) as a new layer on the image.
Effects – 3D Effects – drop shadow –setting is right.
16.
Place this as in example.
Layers – duplicate – image - mirror – place this at the other side.
Layers – merge – merge down – 1 more time.
17.
Activate the top layer.
Activate the tube mmkerstblauw – edit - copy.
Edit - paste as a new layer on the image.
Place this at the right side - see example.
Effects – 3D Effects – drop shadow –setting is right.
18.
Activate the word-art Emmywinterstars – edit - copy.
Edit - paste as a new layer on the image.
Place the word-art right at the bottom – see example.
19.
Activate the top layer.
Selections – select all.
Selections – modify – contract 10 pixels – selections – invert.
Fill the selections with #4b6a8d or another dark color that fit by the image.
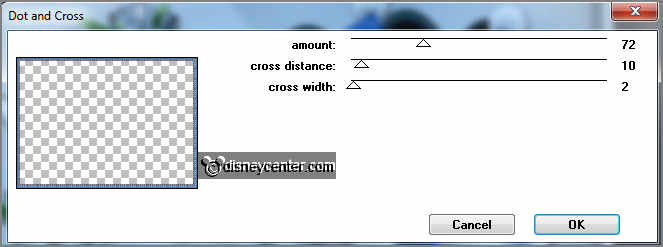
Effects – plug-ins – Penta.com – Dot and Cross –
with this setting click OK.
20.
Effects – 3D Effects – drop shadow –setting is right.
Repeat the drop shadow – now with vert. and horz. at -4.
Selections – select none.
Layers – merge – merge down.
21.
Layers – new raster layer – put your watermark into the image.
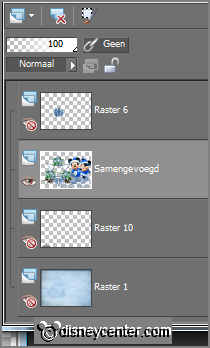
Lock the 2 bottom layers and stay at 1 of the other layers.
Layers – merge – merge all visible layers.
Now you have this below.
22.
Lock the merged layer and open the 2 bottom layers and the layer with the trees.
Edit – copy merged.
Open Animation show – edit – paste as a new animation.
23.
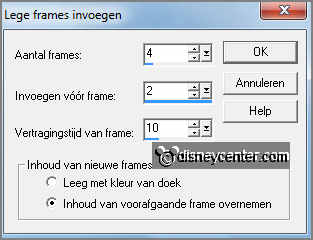
Animation – Insert frames – Empty –
with this setting.
Edit – select all.
Open animation Emmysneeuw – edit – select all.
Edit – copy - edit – paste in selected frames.
Place this at the trees.
24.
Back in PSP – open the merged layer and lock the 3 others.
Edit – copy.
In AS – edit – paste as a new animation.
25.
Animation – Insert frames – Empty – with this setting.

Edit – select all.
Edit – copy - edit – paste in selected frames.
Place it so that the middle frame on the trees fit.
26.
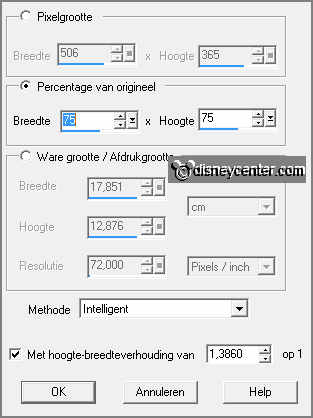
Animation – resize format animation –
with this setting.
File - save as - give name - click 3 times at next
and than at finish.
Ready is the tag
I hope you like this tutorial.
greetings Emmy
Tested by Nelly

Tutorial written 27-12-2012
|